Fresh Milled Flour Chocolate Chip Cookies
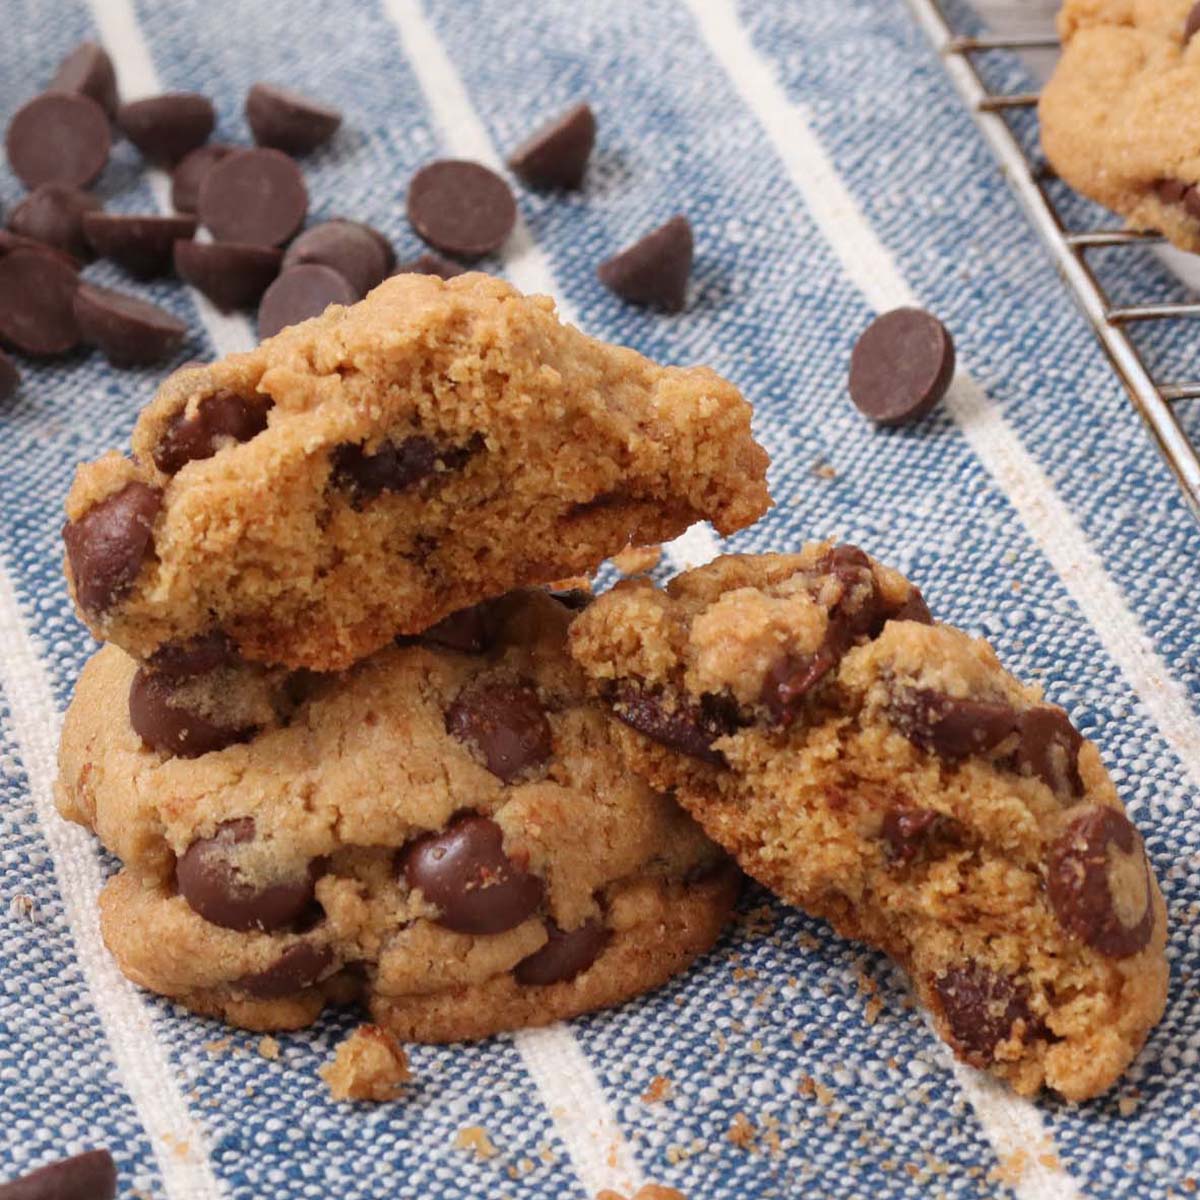
These fresh milled flour chocolate chip cookies bring a familiar favorite to the kitchen with whole grains, real butter, and plenty of chocolate chips. They’re soft, thick, and the kind of homemade treat I love having ready when my family comes looking for something sweet.
Chocolate chip cookies have long been a favorite after-school snack at our house. Below, I’ll share my recipe and the little tips that help them turn out soft and tender.

Ingredients
- 215 grams butter, softened
- 233 grams freshly milled soft white wheat flour
- 100 grams freshly milled hard white wheat flour
- 6 grams salt (1 teaspoon fine table salt)
- 4 grams baking powder (1 teaspoon)
- 2 grams baking soda (½ teaspoon)
- 80 grams brown sugar
- 80 grams white sugar
- 1 large egg
- 1 teaspoon vanilla extract
- 350 grams chocolate chips
- Additional chocolate chips for topping, optional
- Chopped walnuts, optional

How to Make Fresh Milled Flour Chocolate Chip Cookies
Step 1: Soften the Butter and Mill the Grains
Allow 215 grams of butter to soften. The butter should be soft but still hold its shape rather than look melted or oily.
Next, using a fine setting, mill enough wheat to measure 233 grams of soft white wheat flour and 100 grams of hard white wheat flour. Soft white wheat has less gluten-forming protein and helps create a soft, tender cookie. The smaller amount of hard white wheat adds structure so the cookie doesn’t fall apart.
Step 2: Stir Together the Dry Ingredients.
In a separate bowl combine 233 grams freshly milled soft white wheat flour, 100 grams freshly milled hard white wheat flour, 6 grams salt, 4 grams baking powder and 2 grams baking soda. Stir thoroughly with a spoon, then set aside.
Baking soda helps with browning and spread, and it reacts with acidic ingredients such as the molasses in brown sugar to provide lift. Baking powder supplies additional lift with its own acid already included. I use both to balance the cookies’ thickness, spread, and browning.
Step 3: Cream the Butter, Sugars, Egg, and Vanilla.
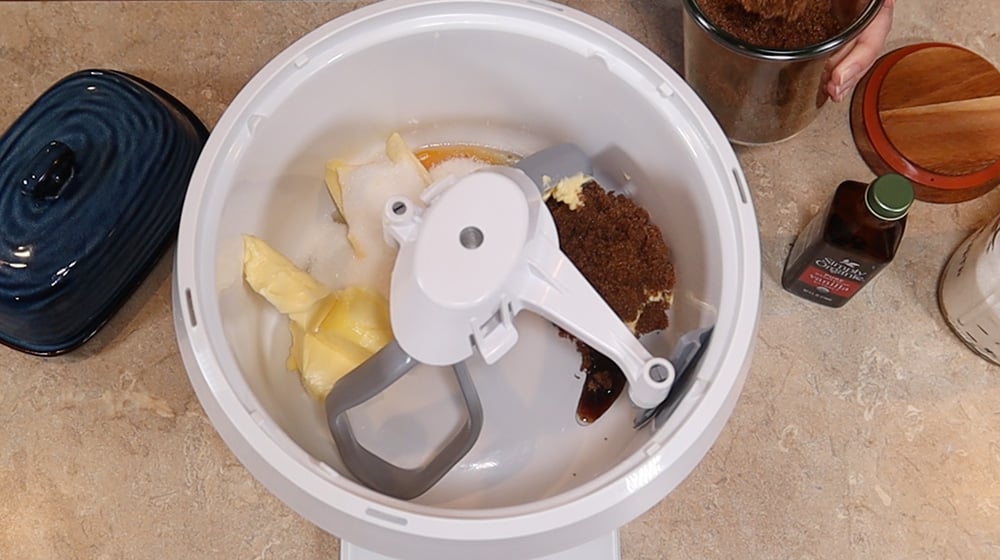
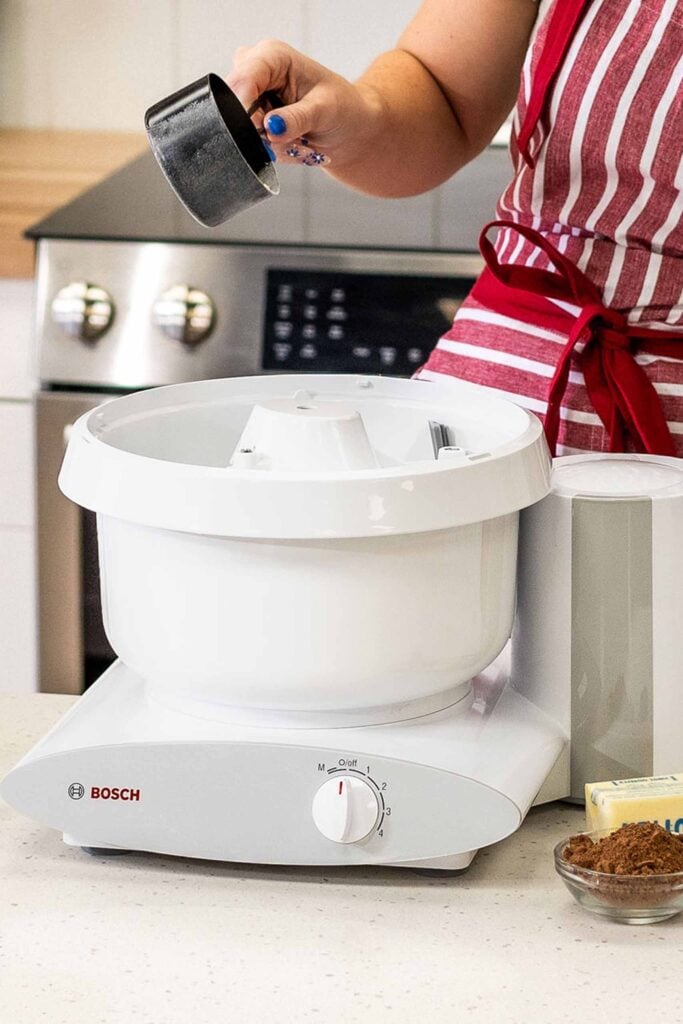
Fit your stand mixer with cookie paddles. I use my Bosch Universal Plus. Add 215 grams softened butter, 80 grams brown sugar, 80 grams white sugar, 1 large egg and 1 teaspoon vanilla extract.
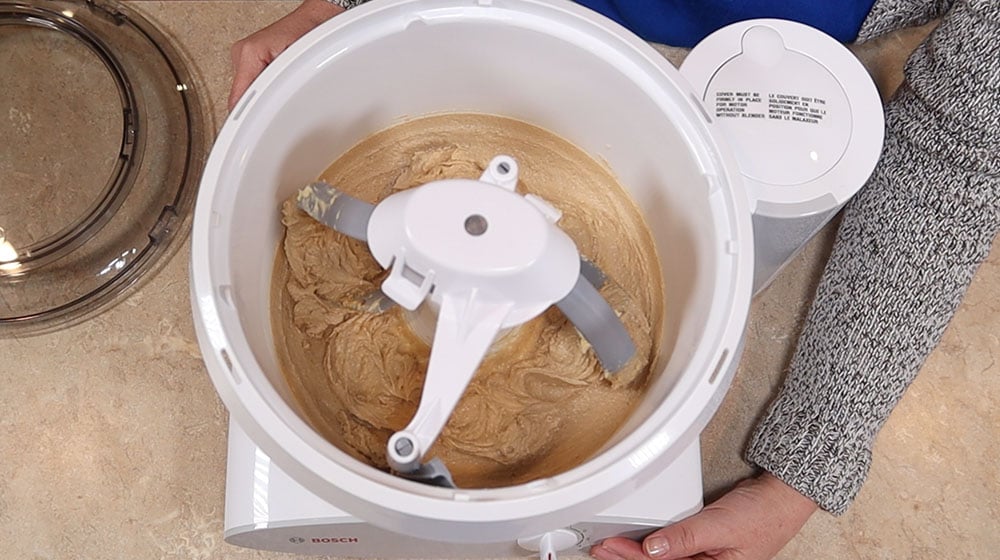
Beat until the mixture thickens, looks creamy, and turns a lighter brown shade. Don’t stop as soon as the ingredients are combined. That change in color and texture is what I look for before adding the flour. Mixing incorporates small pockets of air into the softened butter, while the egg helps bring the fat and water-based ingredients together.
Tip
- Adjust the sugar if you prefer more spread. For a more traditional chocolate chip cookie shape, use 100 grams of brown sugar and 100 grams of white sugar, keeping the other ingredients the same. Bake that version at 350°F for approximately 14 minutes, then let the cookies set on the baking sheet for about 2 minutes before transferring them. Sugar affects more than sweetness. It attracts water and influences how the dough spreads before its structure sets in the oven. The main recipe’s lower sugar amount gives me thicker cookies.
Step 4: Add the Flour Mixture and Chocolate Chips.
Add the dry mixture from Step 2. Mix just until incorporated, scraping the bowl as needed. Then add 350 grams of chocolate chips and mix briefly to distribute them.
Tips
- Avoid overmixing after adding flour. Extra mixing encourages gluten development and can make the cookies tougher.
- Make cookies with and without walnuts from one batch. My husband loves walnuts, but my son prefers his cookies without them. I bake the first few cookie sheets without nuts, then stir chopped walnuts into the remaining dough. Everyone gets the cookies they like without making another batch.
Step 5: Refrigerate the Dough While the Oven Preheats
Cover the dough and refrigerate for at least 15 minutes. Meanwhile, preheat the oven to 350°F and line your baking sheets with parchment paper. This rest gives the freshly milled flour time to absorb moisture and allows the butter to firm up.
Tip
- Bake the dough cold. Warm dough can spread into thin edges that brown faster than the centers. Chilling helps control that spread. If the dough still feels very soft after 15 minutes, leave it in the refrigerator longer. Thirty minutes or more can be helpful, especially in a warm kitchen.
Step 6: Scoop and Bake for 18 Minutes
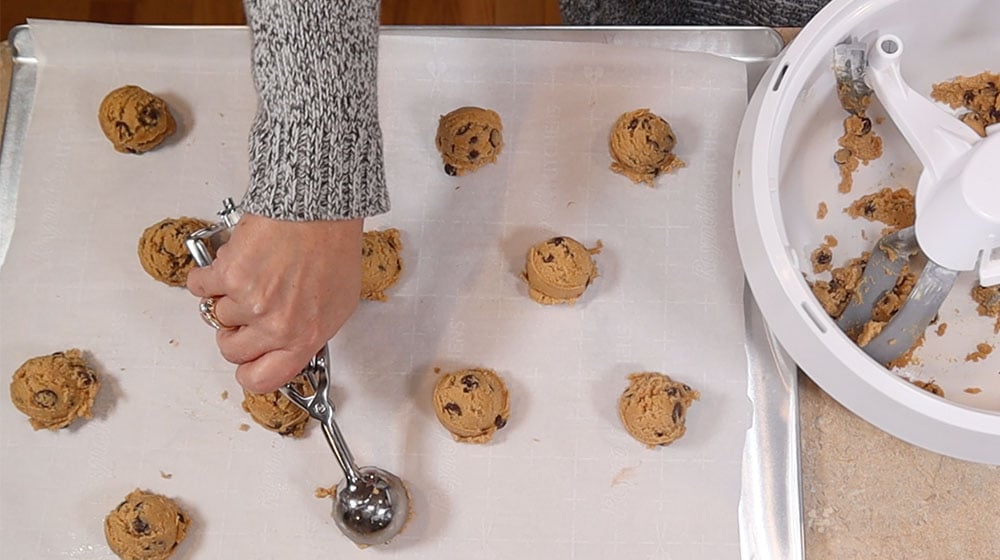
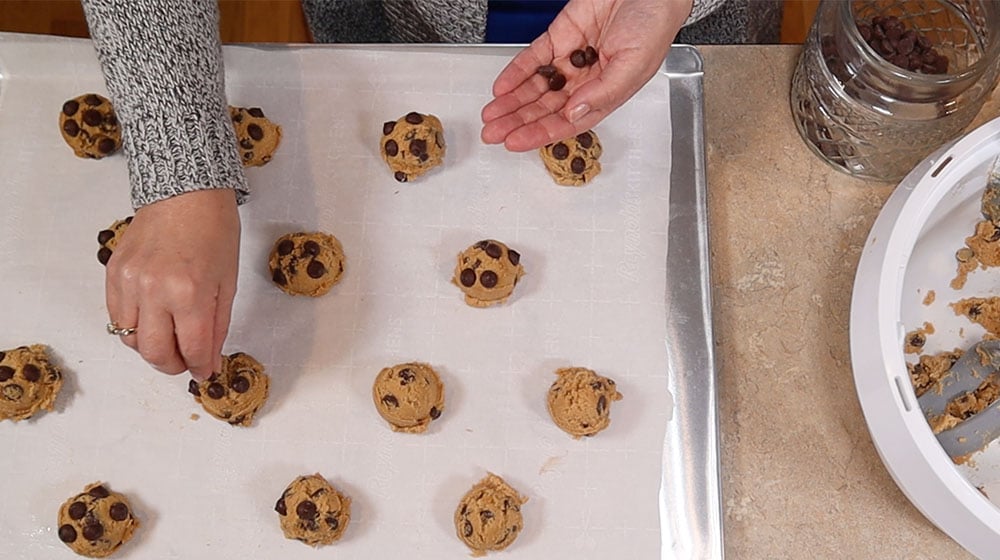
Use a 2-tablespoon cookie scoop to portion the chilled dough onto the prepared baking sheets, leaving room between the cookies. Bake at 350°F for approximately 18 minutes. Watch the first batch closely, since ovens and baking sheets vary.
Tips
- Keep the portions consistent. Equal portions bake more evenly. Larger or smaller cookies will need a baking-time adjustment.
- Add extra chocolate chips for a beautiful finish. After scooping, gently press a few additional chocolate chips into the top of each dough portion right before baking. This is completely optional, but it makes the chocolate stand out on the finished cookies—a nice touch if you’re baking them as a gift, for a farm stand, or to share on a cookie tray.
- Refrigerate the remaining dough while each batch bakes. Keeping it cold helps the last batch bake as consistently as the first.
- Start each batch on a cooled baking sheet. A hot sheet begins warming the dough before it reaches the oven and can cause extra spreading.
Step 7: Let the Cookies Set Before Transferring
Remove the cookies from the oven and let them rest briefly on the baking sheet until firm enough to lift. Carefully transfer them to a cooling rack. The baking sheet’s retained heat provides a little carryover cooking, and the cookies begin firming as they cool.
Tip
- Allow time to set instead of extending the bake. Moving soft cookies immediately can cause them to fall apart. Leaving them in the oven longer just to make them easier to lift can overbake them and leave them harder once cooled. This is especially important for the higher-sugar variation, which is more delicate while hot.
Step 8: Cool Completely and Store Airtight
Allow the cookies to cool completely, then store them in an airtight container.
Tip
- Add a slice of bread to help keep cookies soft. When I use store-bought brown sugar, I put a slice of plain bread in the container. Usually, it’s the heel, because no one in my house really wants to eat that part anyway. Moisture moves from the bread to the cookies inside the container. The cookies stay soft while the bread gradually dries out.
Questions About Brown Sugar
Can I Use Homemade Brown Sugar in These Cookies?
Yes—I often do. I mix white sugar with old-fashioned molasses until the color looks right. I weigh most of my baking ingredients, but this is one of those things I tend to eyeball! It generally works out to approximately 30 grams of molasses for every 100 grams of white sugar.
My mixture has more molasses than typical store-bought brown sugar, so it gives the cookies a richer molasses flavor and can affect their moisture and spread.
Note: Weigh the finished brown sugar mixture. Measure the recipe’s 80 grams of brown sugar after mixing the white sugar and molasses, rather than using 80 grams of white sugar plus additional molasses.
Why Do My Cookies Stay Soft With Homemade Brown Sugar?
I’ve noticed that cookies made with my homemade brown sugar stay softer longer. Molasses adds moisture and contains sugars that attract and retain water. Those sugars also help slow recrystallization, supporting a softer, chewier texture.
Why Does My Homemade Brown Sugar Stay Softer in Storage?
Store-bought brown sugar hardens when it dries out. The extra molasses in my homemade mixture helps it retain moisture longer. I keep it in an airtight container, and it has stayed softer for me than store-bought.
A Batch for Your Family
Some of the things we remember most from our kitchens are the simplest—a familiar smell, a favorite treat, someone making something just the way we like it. That’s what I love about baking for my family. A batch of cookies might seem like a small thing, but taking the time to make them is one of the ways we say, “I was thinking of you.”
I hope these cookies find a place in your kitchen, whether you’re setting them out after school, taking a plate to a neighbor, or baking alongside someone you love. Those everyday moments are how our cooking traditions carry on, one batch at a time.
Shop This Post
This post contains affiliate links. As an Amazon Associate, I earn from qualifying purchases. If you click and make a purchase, I may earn a small commission at no extra cost to you. Rest assured, I only recommend products I have personally used and genuinely love, so you’re in good hands.
AN ORGANIZED PANTRY, BEAUTIFULLY LABELED
Custom Pantry Label Maker
Keep your grains and baking ingredients easy to find with labels you make yourself. Choose a design, type your own text, and print at home.
Fresh Milled Flour Chocolate Chip Cookies
Ingredients
Equipment
Method
- Allow 215 grams of butter to soften until it mixes smoothly but still holds its shape rather than looking melted or oily. Using a fine setting on your grain mill, mill enough wheat to measure 233 grams of soft white wheat flour and 100 grams of hard white wheat flour. Keep this blend as written: the soft white makes the cookies tender, while the hard white helps them hold together.
- In a separate bowl, stir together the freshly milled flours, 6 grams salt, 4 grams baking powder, and 2 grams baking soda. Set aside.
- Fit your stand mixer with cookie paddles. Beat together 215 grams softened butter, 80 grams brown sugar, 80 grams white sugar, 1 large egg, and 1 teaspoon vanilla extract until creamy, slightly thickened, and lighter brown. For cookies with more spread, increase both sugars to 100 grams each and use the shorter baking time below.
- Add the dry ingredients and mix just until incorporated, scraping the bowl as needed. Add 350 grams chocolate chips and mix briefly to distribute them. Avoid overmixing after adding flour, which can make the cookies tougher. Add chopped walnuts if desired, or bake part of the dough without nuts before stirring walnuts into the remainder.
- Cover and refrigerate the dough for at least 15 minutes. Meanwhile, preheat the oven to 350°F and line baking sheets with parchment paper. If the dough still feels very soft, chill longer until cold and firmer.
- Use a 2-tablespoon cookie scoop to portion the chilled dough onto the prepared baking sheets, leaving room between the cookies. Equal portions bake more evenly; larger or smaller cookies will need a baking-time adjustment. For an optional decorative finish, gently press a few additional chocolate chips onto each dough portion before baking.
- Bake for approximately 18 minutes. For the variation made with 100 grams of each sugar, bake for approximately 14 minutes instead. Keep the remaining dough refrigerated while each batch bakes, and use cooled baking sheets for subsequent batches to limit spreading.
- Allow the cookies to firm up briefly on the baking sheet before carefully transferring them to a cooling rack. The higher-sugar variation needs about 2 minutes on the sheet. Avoid extending the baking time just to make the cookies easier to lift, as this can overbake them.
Notes