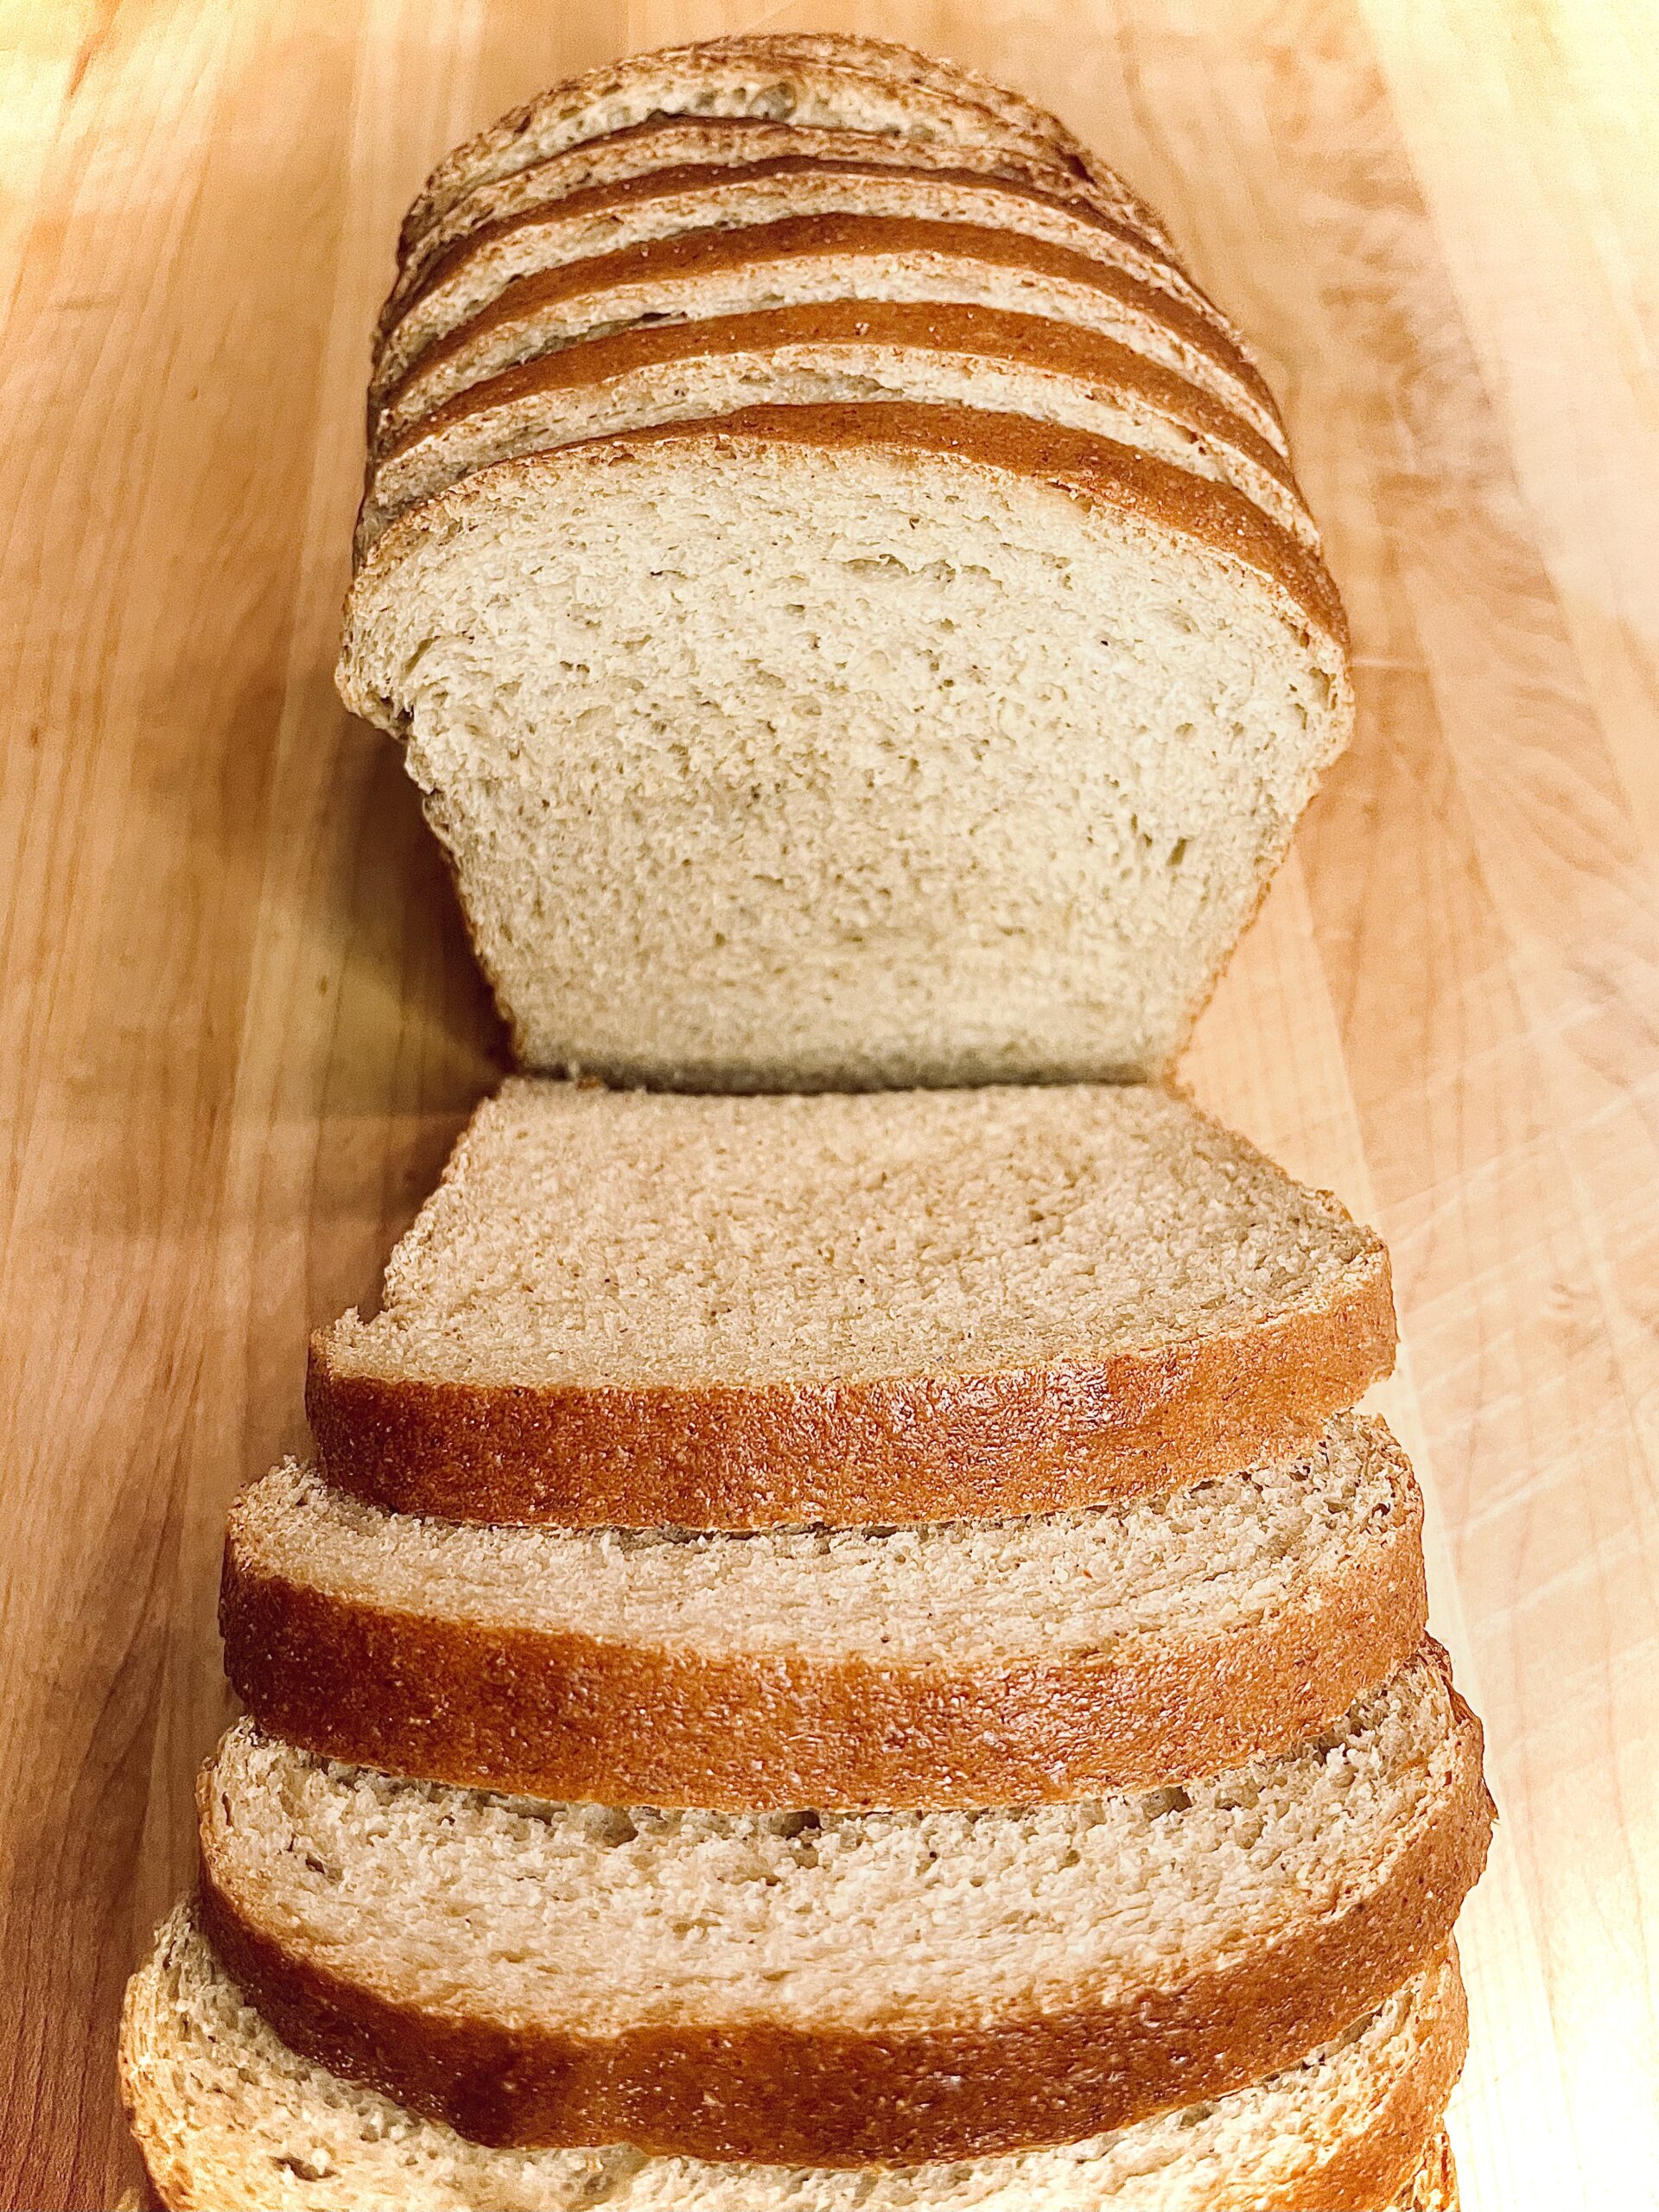
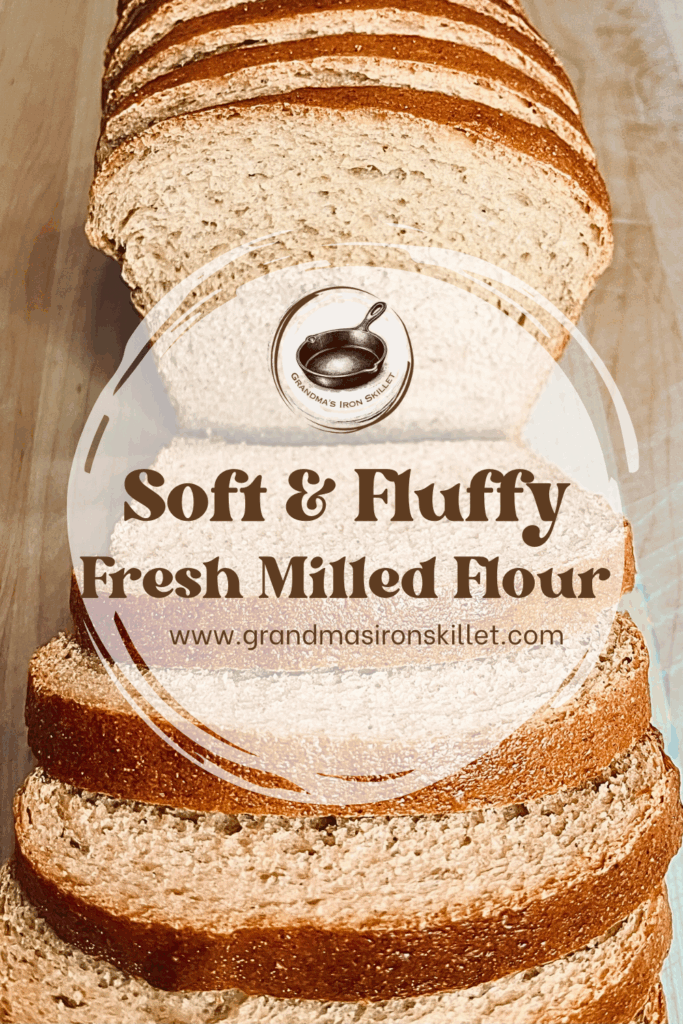
Soft Sandwich Bread Made with Fresh Milled Flour
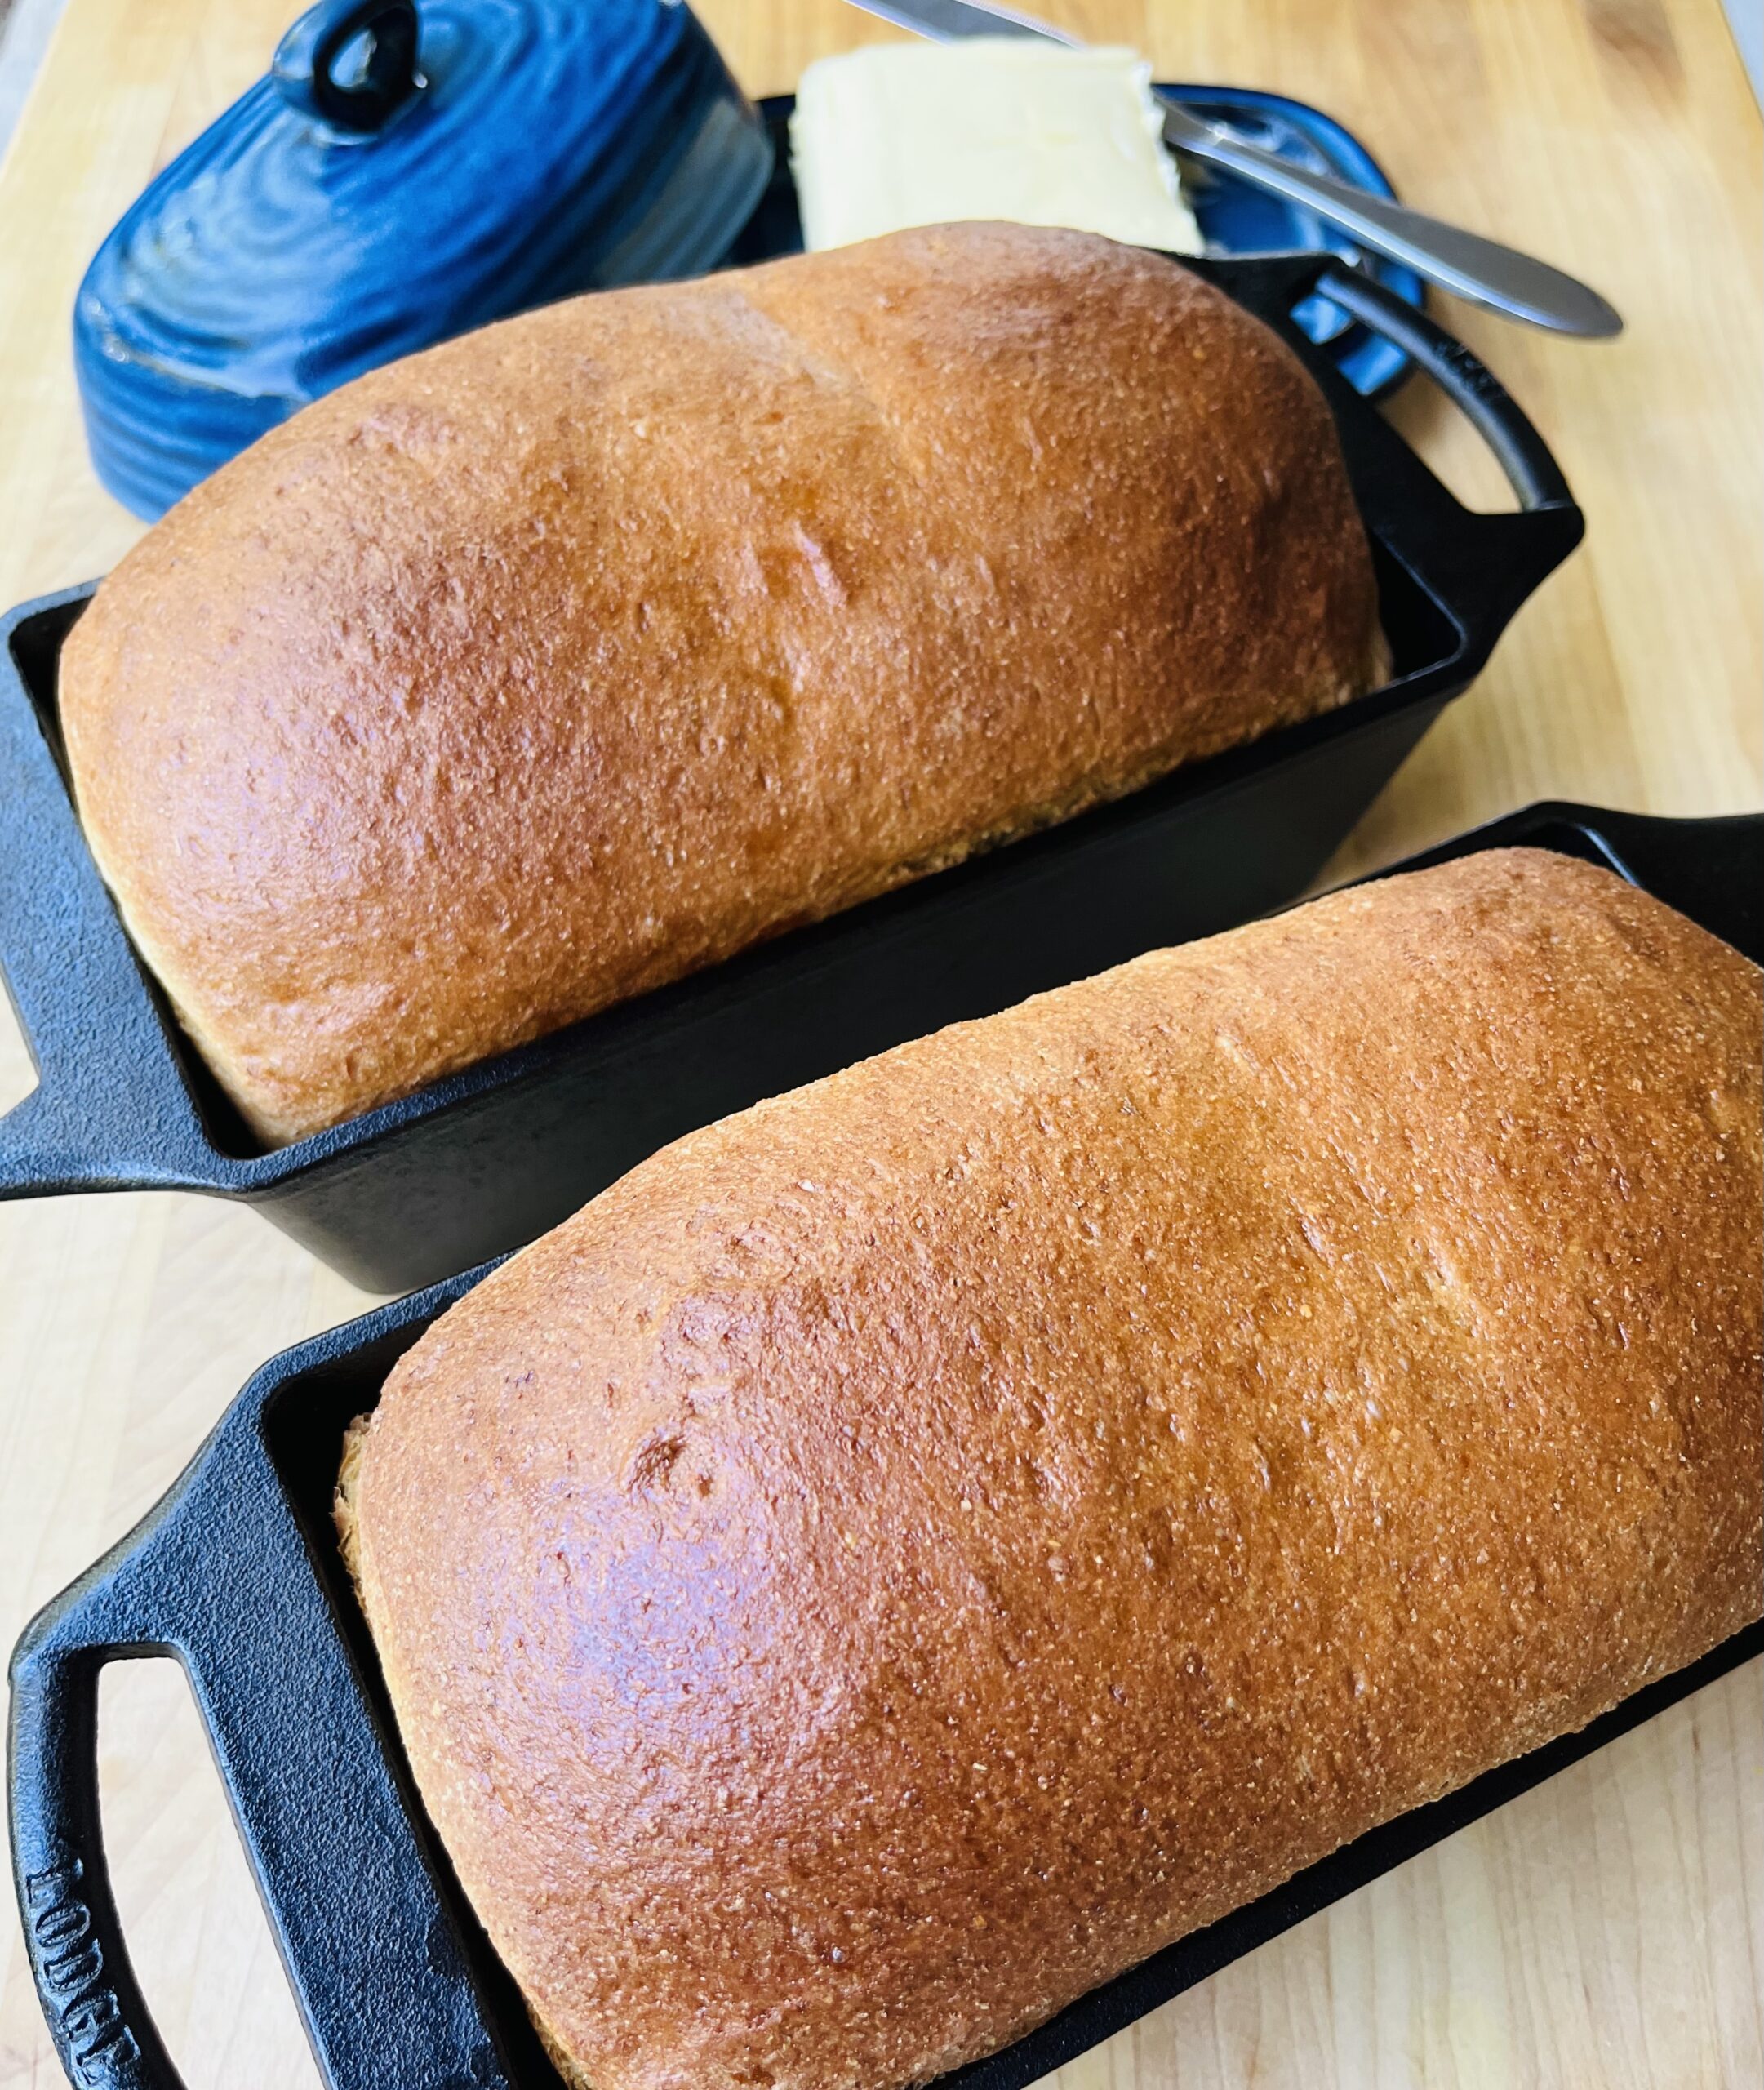
Fresh baked bread smells like HOME…
How to Make Soft Sandwich Bread with Fresh Milled Flour:
This sandwich bread made with fresh milled flour is a staple at our house. It’s my go-to recipe that will provide you and your family with the most nutritious sandwich bread that has limitless possibilities for quick and easy meals.
This recipe also freezes well. I’m a busy Mom and I don’t have time to bake bread every week or every few days. I like to make several batches at one time so I can keep it in the freezer and always have some on hand. I like to slice the bread prior to freezing. Then, I can take out only the amount of bread that I will need at a time to prevent any waste. A few slices of bread only take a few hours to thaw at room temperature. It’s perfect for packing sandwiches for school lunch or a homemade lunch at the office.
Additionally, I use this same basic dough recipe to make soft yeast rolls, buttery garlic knots, and cinnamon swirl bread. The possibilities are endless. So, let’s get started on making some delicious, healthy, soft sandwich bread.
*This post contains affiliate links. Please reference full disclosure policy.
A few notes:
The overall time for making this recipe is high, however, most of the time is hands off. Working this recipe into a busy schedule is very doable. The seven steps include: mixing, autolysing, kneading, bulk fermenting (letting it rise), shaping, proofing, and then baking.
To get the most accurate results for any recipe you will want to measure by weight rather than volume. This is even more critical when using fresh milled flour. During processing and packaging commercial flour becomes dense and compact. Fresh milled flour is loose and dispersed. These characteristics dramatically impact the results when measuring by volume rather than weight.
Additionally, this is a very wet dough and designed to be kneaded in a stand mixer.
Step 1. Mixing:
First, you will want to measure 660 grams of wheat berries. For this recipe, I like to use a mix of Khorasan and hard white wheat. I love to mix khorasan in most of my recipes as it adds a wonderful rich flavor to the recipe. However, khorasan alone does not have a the proper protein content to develop a strong enough gluten structure to make a great bread loaf, so you’ll want to be sure to use no more than a ratio of 1:3 with a wheat berry that has a higher gluten content such as hard white or hard red. For this recipe I like to use even a higher ratio of hard white wheat and use 473 grams of hard white and 187 grams of khorasan. This amount is just enough khorasan to add a rich flavor without compromising the gluten content of the bread. If you don’t have khorasan you can use all hard white. Hard red wheat berries are another great option.
Next, you will mill the wheat berries through your grain mill. I have a Nutrimill Harvest so I can get a full 660 grams of flour one-for-one out of my grain mill. If you have trouble getting all the flour to move through your mill you may need to weigh out one or two grams extra of wheat berries to account for any loss you may experience in the milling process. Once you have the flour freshly milled add 11.5 grams (2 tsp) of salt and 26 grams (¼ cup) of dry milk powder to the flour and gently mix with a spoon. Then set aside.
Tip:
If you don’t have milk powder, you may omit it but you will need to substitute the water for milk.
After that, measure 418 grams of water and warm until it’s approximately 95° F to 105°F. This can be done by placing in the microwave for approximate 45 seconds. If it’s particularly hot and humid outside, it is not necessary to warm the water. The heat generated from the stand mixer is often enough to activate the yeast. Add water, 39 grams of olive oil, 85 grams of honey, and 1 room temperature egg to a stand mixer. Mix the liquid ingredient. Start out at a low speed and then slowly increase the speed to medium until all the wet ingredients are well mixed.
Once the wet ingredients are mixed, gradually add the freshly milled flour mixture. Mix on a low to medium speed just until all the flour is no longer dry. It should only take one to two minutes. Don’t over mix at this point. You’re just trying to get the flour wet at this stage.
Step 2. Autolysing:
Next, Cover and let rest for 1 hour. This rest period is called Autolysing. It is a critical step to successfully baking with fresh milled flour. Autolysing is a rest period that allows the flour to fully absorb the liquid. It also plays a role in better gluten development. This is especially important with fresh milled flour as it gives the wheat germ and bran the opportunity to soften up. Skipping this step will result in a more dense and crumbly loaf.
Step 3. Kneading:
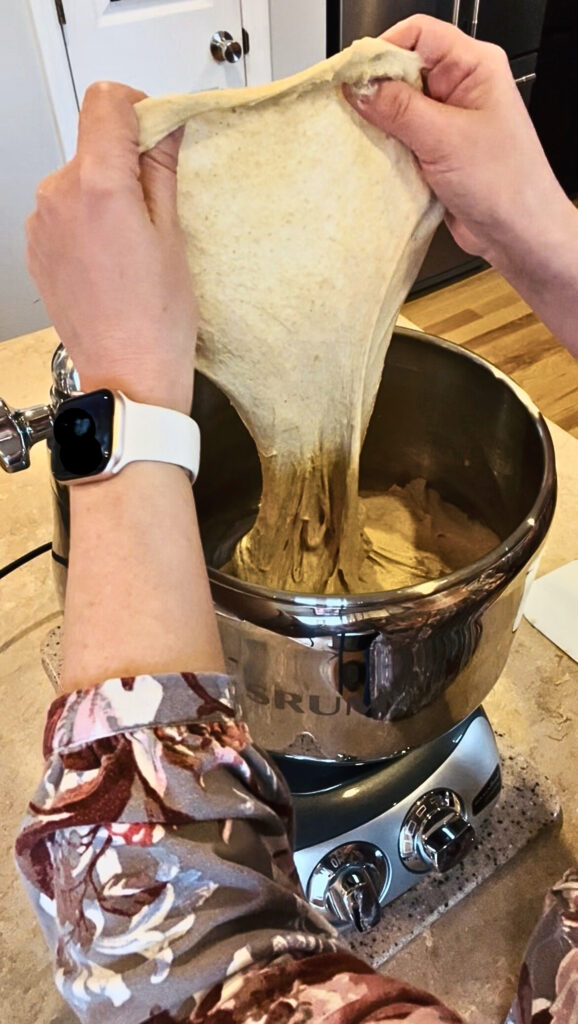
After the dough has autolysed for one hour, add 2 1/2 tsp instant yeast. I like to use saf-instant. Then, knead in your stand mixer until you have reached a windowpane. Trust the process and DO NOT add any extra flour at this point. When you first start mixing this is a very wet dough. It will come together. As you start to knead you will see the dough strengthen. It will begin to ball up and become one cohesive unit. The kneading process will be done when you reach the windowpane stage. Windowpane is determined by pulling a piece of the dough upward. Then, stretch until it becomes very thin and translucent before it breaks. Depending on your mixer, reaching a windowpane can take anywhere between 5-30 minutes. If you are new to making bread, I highly recommend watching it closely as you can over knead the dough. Over kneading can cause the dough to break down and lose the gluten structure. The result of the bread will be tough and chewy. Stop the mixer frequently to test for a windowpane. Once you become more experienced you will know about how long it takes your mixer so you can walk away clean up dishes or tend to something else while your stand mixer does all the work. I have an Ankarsrum mixer that has a timer on it. My mixer does a very gentle and slow knead. It takes me about 24 minutes set at the 3 o’clock position to reach windowpane. My Bosch mixer will reach windowpane in about 8 minutes on speed 2. A Kitchen Aid will vary based on the specific model you have.
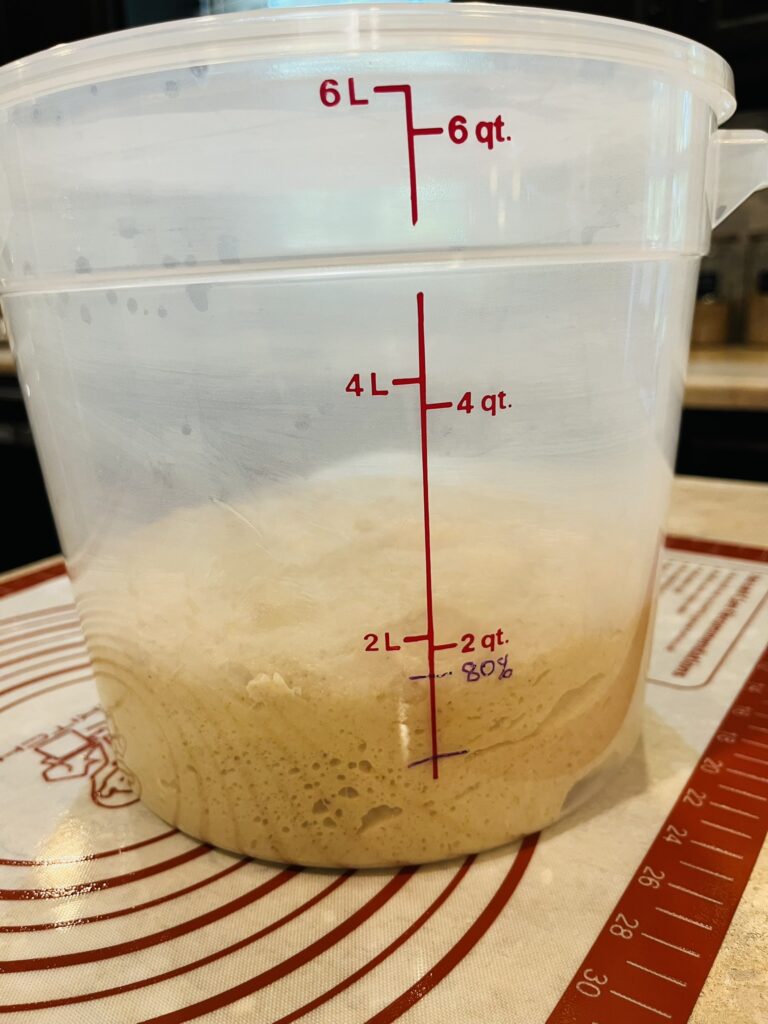
Step 4. Bulk Fermenting (Letting the dough rise):
Next, very lightly oil your proofing container. A see through bowl will work great. I generally use olive oil since I have it on hand. The lightly oil surface will help so your dough doesn’t stick. Then, transfer your dough to the proofing bowl or container. Cover and let rest in a warm place until it increases by about 80%. The amount of time it takes for your proofing depends on the starting temperature of your dough and the temperature and moisture of your environment. Generally, takes about 30 minutes to 1 hour at room temperature (70-75°F) to reach 80% increase in bulk. I would recommend setting an alarm and checking on it every 30 minutes so you can gauge how fast your dough is rising. Bread is greatly dependent on the environment, and no two loaves will ever be the same. I live in an area that gets all 4 seasons, so I get very different results in the winter then I do in the hot humid summers. Don’t over proof your dough at this point or it will cause the final product to be crumbly.
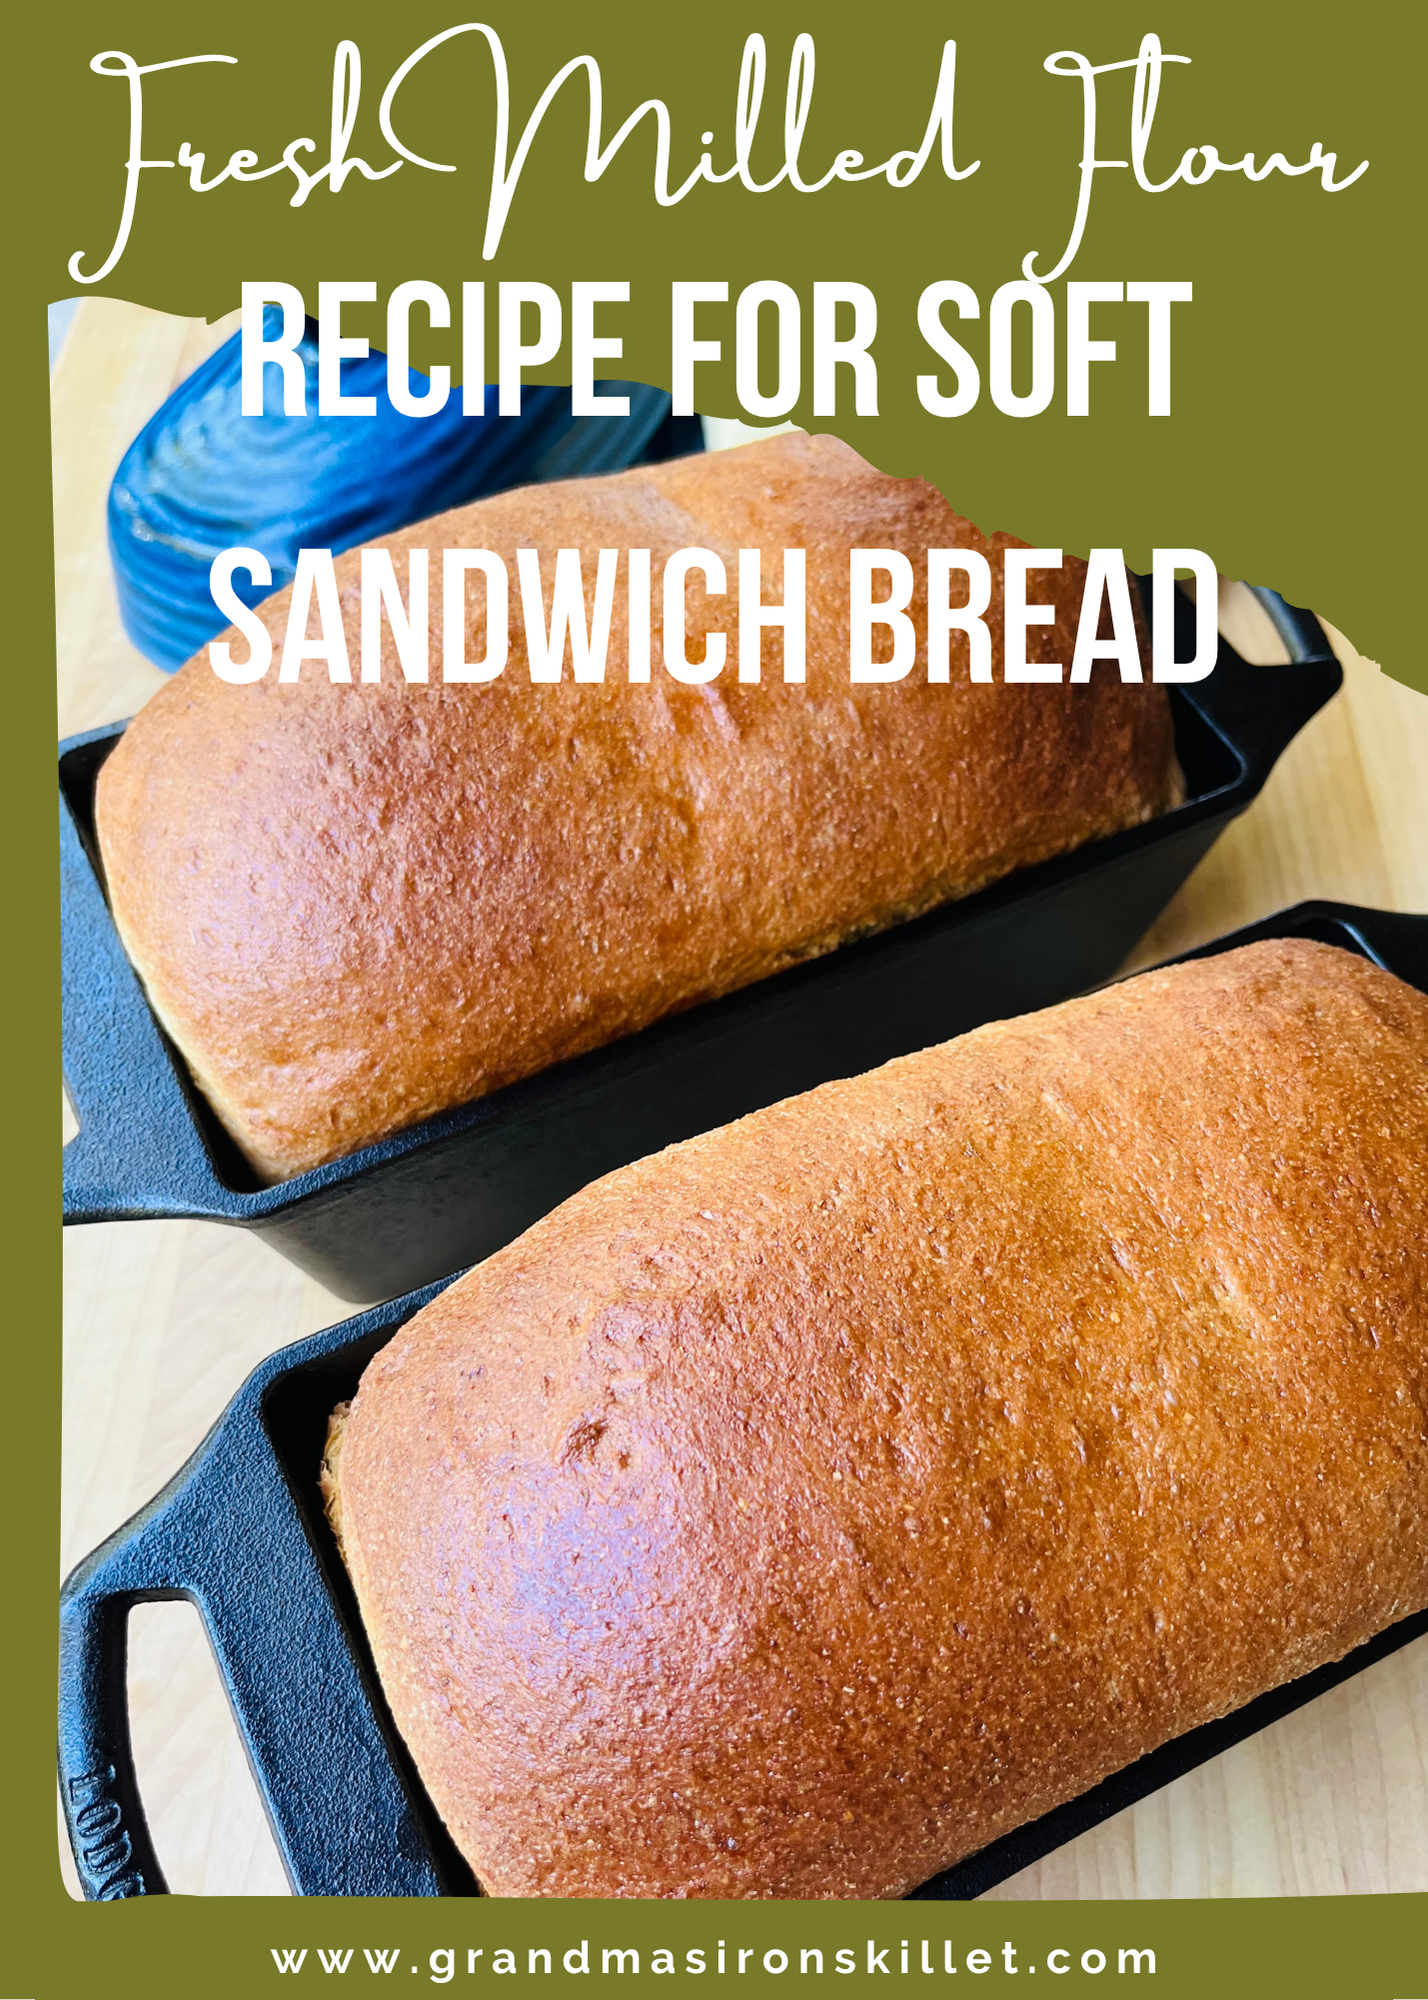
While you are waiting for your dough to rise, prepare two 4.5 x 8.5 loaf pans by greasing them. I get much better results with cast iron loaf pans, but any type of loaf pan will work. If using cast iron grease with butter or lard to prevent sticking. Other oils, such as olive oil don’t work well as the smoke point of these oils is not high enough to prevent sticking to cast iron.
Step 5. Shaping:
Once your dough has increase by 80% begin the shaping process. Turn the dough out on to a lightly oiled surface and cut in half. Lightly oil your hand and work surface. Take half the dough and use your fingers to gently push the dough out into a rectangle shape the approximate length of your loaf pan. Pull each corner of the dough closest to you halfway upward toward the middle to create a “V” shape on the lower half of the dough. Next, grab the middle of the “V” and pull upward to the middle of the dough while creating some tension. After that, roll the dough toward the top with tension to create a log shape. Pinch each end and tuck under to fit the length of you loaf pan. Then, grab the edge of the dough and push it across your work surface to create additional surface tension. Keeping the tension on the dough, use your dough scraper to assist you in lifting the dough into the loaf pan. Repeat with shaping process with the other half of the dough. Surface tension is very important as it holds the structure of the dough together as it rises.
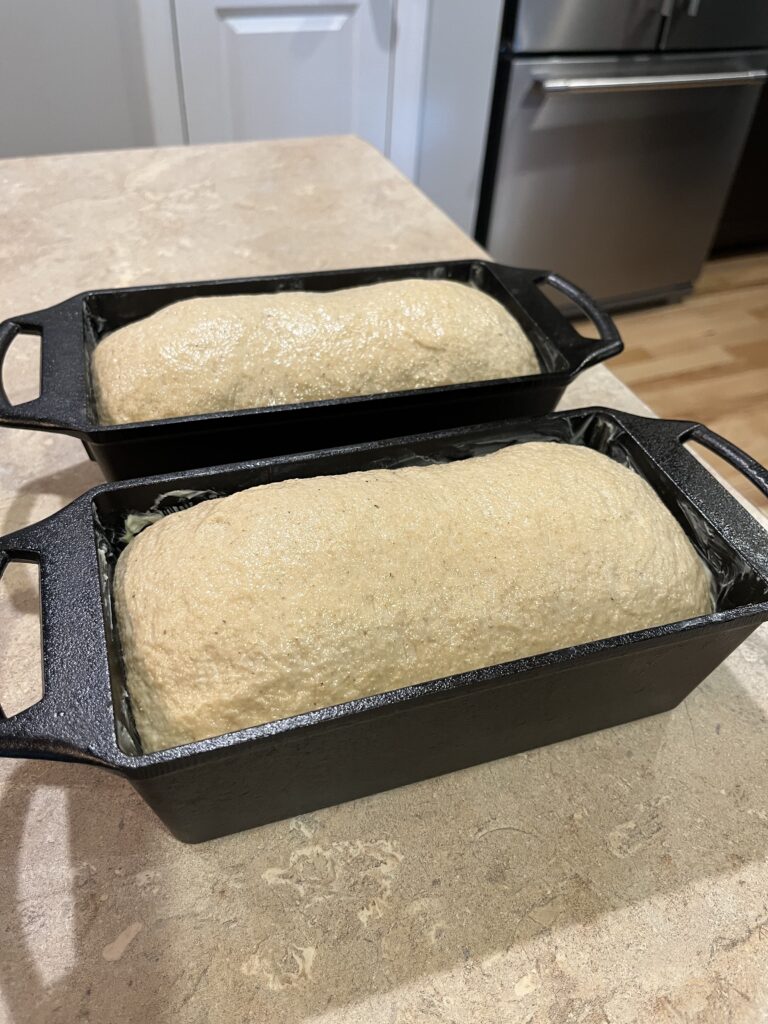
Step 6: Proofing:
Cover pans and set in a warm place to rise. Once the dough rises to the top of the pans it’s ready to bake. It should take about 1-2 hours at room temperature. Toward the end of the rising time, preheat oven to 350 °.
Step 7. Baking:
Once fully risen, remove cover from loaves. If desired, whisk the whites from 1 egg with about 1 teaspoon of water. Brush egg wash on top of bread. While this step isn’t required it adds a nice shiny finished to the bread. I never skip this step. Place in oven and bake at 350° for 35-40 minutes. If you are using a cast iron loaf pan it will take 40-45 minutes. Cover lightly with foil after 25 minutes to avoid the top over browning. The internal temperature should be 195°. Remove from pan and allow it to completely cool before slicing. This should take about 1-2 hours. I find an electric knife works great for slicing this super soft sandwich bread.
Shop this post:
*This post contains affiliate links. As an Amazon Associate, I earn from qualifying purchases. If you click and make a purchase, I may earn a small commission at no extra cost to you. Rest assured, I only recommend products I have personally used and genuinely love, so you’re in good hands.
Use code GRANDMA20 to get $20 off Bosch Mixers, Artiste, and Magimix
Ankarsrum Original Stand Mixer (Free Shipping)
Lodge Cast Iron 2 Piece Loaf Pan Set
Brod & Taylor Precision Kitchen & Coffee Scale with Timer | (0.1g Precision)
Soft Sandwich Bread for Fresh Milled Flour
Ingredients
Method
- Measure 660 grams of wheat berries. For this recipe, I like to use a mix of khorasan (187 g) and hard white wheat (473 g). Khorasan adds a wonderful rich flavor to the recipe. However, khorasan alone does not have the proper protein content in it to develop a strong gluten structure required make a great bread loaf, so you’ll want to be sure to use no more than a ratio of 1:3 with a wheat berry that has a higher protein content such as hard white or hard red.
- Mill the wheat berries through your grain mill.
- Add 11.5 grams (2 tsp) of salt and 26 g dry milk powder (1/4 c) to the flour and gently mix with a spoon. Then set aside.
- Measure 418 grams of water and warm until it’s approximately 95° F to 105°F.
- Add water, 39 grams of olive oil, 85 grams of honey, and 1 room temperature egg to a stand mixer.
- Mix the liquid ingredient. Start out at a low speed and then slowly increase the speed to medium until all the wet ingredients are well mixed.
- Gradually add the freshly milled flour mixture. Mix on a low to medium speed just until all the flour is no longer dry. It should only take one to two minutes. Don’t over mix at this point. At this stage, you’re just trying to get the flour wet.
- Cover and let rest for 1 hour. This rest period is called autolysing.
- Add 2 1/2 tsp instant yeast.
- Knead in stand mixer until you have reached a windowpane.
- Lightly oil your proofing container.
- Transfer your dough to the proofing bowl or container.
- Cover and let rest in a warm place until it increases by about 80%. Approximately 30 minutes to 1 hr.
- Prepare two 4.5 x 8.5 loaf pans by greasing them with butter or lard.
- Lightly oil your hands and work surface. Turn the dough out onto a lightly oiled surface and cut in half.
- Shape half of the dough into loaf and create surface tension.
- Placed in a greased 4.5 x 8.5 loaf pans.
- Repeat shaping process for second half of dough and place in greased loaf pan.
- Cover and set in a warm place to rise to top of pan. Approximately 1-2 hours.
- Toward the end of the rising time, preheat oven to 350 °.
- Once fully risen remove cover from loaves.
- If desired, whisk the whites from 1 egg with 1 teaspoon of water. Brush egg wash on top of bread.
- Place in oven and bake at 350° for 35-40 minutes. Cover lightly with foil after 25 minutes to avoid the top over browning.The internal temperature should be 195°.
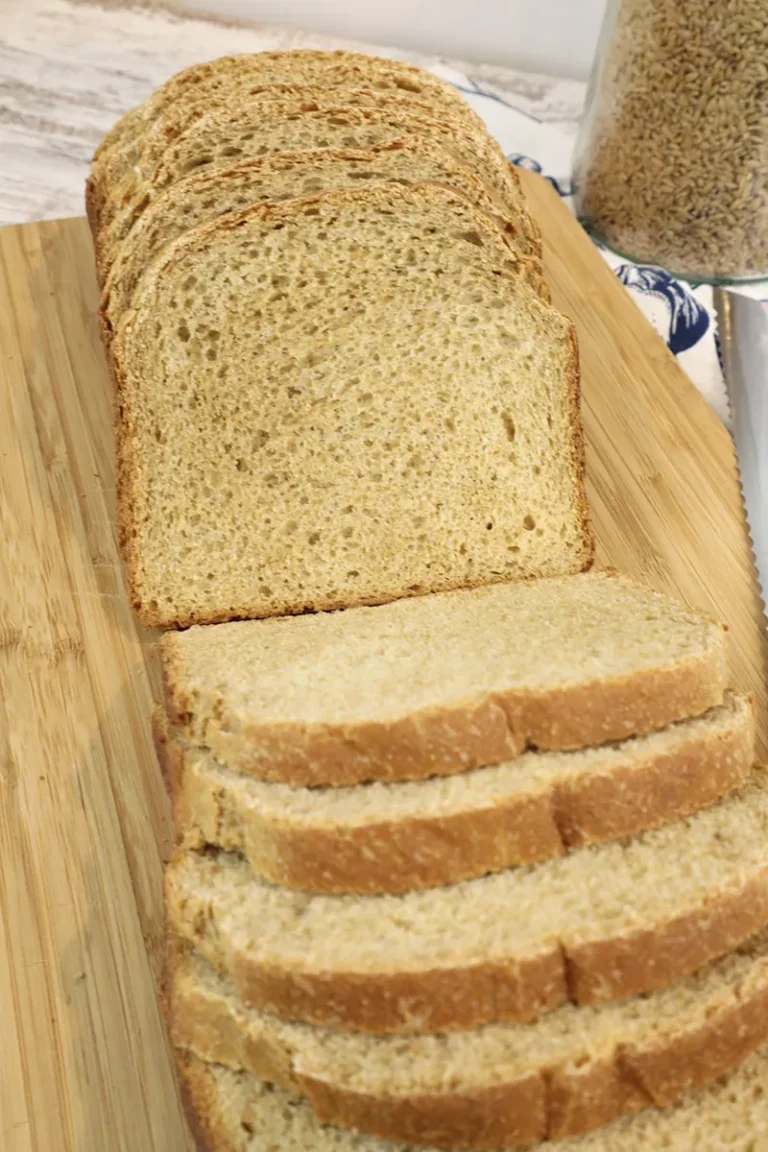
- Remove from pan and allow it to completely cool before slicing. This should take about 1-2 hours. I find an electric knife works great for slicing this super soft sandwich bread.
JOIN MY NEWSLETTER TO RECEIVE…
The latest blog post, recipes, and updates!


Hi, just curious how you would substitute the dry milk powder with regular milk?? Also how much active dry yeast would I use instead of instant yeast??? And do I need to activate ii if I know it’s good yeast?? I’ve heard you just let the bread rise longer….but I have always activated my yeast beforehand but would love to skip that step!. Thanks for answering. I’m really trying to get a non crumbly loaf! 😃
Hi TJ, If you want to use milk instead of milk powder you will need to omit the milk powder and substitute the water for milk. I have the best results with instant yeast. However, if you want to use dry active yeast you would use the same amount. You may just need a longer bulk fermentation time. You’ll know it’s ready when it reaches 80% rise in bulk. If you use warm liquid you shouldn’t have to activate the yeast ahead of time.
If you’re still running into difficulty with the dry active yeast, I would recommend making the switch to instant yeast for this recipe. I buy mine in bulk and store it in an airtight container in the freezer. I take it out of the freeze and measure what I need. Then, put it directly into my recipe and return the rest back to the freezer. It will stay fresh for years.
well tried this recipe and everything went well till pan rise…got to pan edge but didn’t rise any farther …smells amazing but is not very tall…first try will try again eventually
Hi Joy, A couple of things to try… make sure you are bulk fermenting (the first rise) by 80%. It’s very easy to over proof fresh milled flour. The best way to bulk ferment is to use a container with straight sides. That way there is no guessing on how much it’s risen. Also, make sure you are using fresh yeast. I use Staf-instant yeast and store it in the freezer to keep it fresh. Lastly, make sure your liquid it at the right temperature. If your liquid is too hot it will kill the yeast. If it’s not warm enough it won’t activate the yeast allowing it to rise. It also needs a warm spot to rise.
Best bread ever!!
Makes GREAT sandwich bread!
I’ve tried many recipes and this one is the best. It’s definitely my new go to recipe. It turns an out perfect every time!
This is hands down the best bread recipe I’ve ever made, it even beats all purpose flour recipes. It’s soft, fluffy, holds together well, and my kids say it tastes like white bread. My daughter couldn’t get behind fresh milled until THIS recipe. I double it and make 4 loaves at a time. Thank you for making the best recipe, ever! Somehow it gets better every time I make it.
Thank you for sharing, Megan! I’m so glad your family loves this recipe!
Thanks for such a wonderful recipe!
Hi Laura! I’m so glad you like the recipe! Thanks for the feedback!
Do you think I can get good results tripling this? Quadrupling? I have a big family. And a Bosch. 🙂
Also, I only have full fat dry milk powder (organic whole milk powder). Should I adjust the oil a tad?
Hi Sarah, You don’t need to adjust the oil ratio to use full fat dry milk powder. I often use that with no adjustments and it turns out perfect. I haven’t tested tripling this recipe but if you want to experiment with that, I would use a little less yeast. If you have too much yeast your bread will ferment too fast and be crumbly.
This is definitely the best 100% whole wheat recipe I’ve ever found! Thank you so much! I have one question: the only non-shelf-stable ingredient is the egg… Do you have any recommended substitutions for the egg in this recipe if I’m out of eggs and don’t want to run to the store?
Hi Meg, I’m so happy you like my recipe! I have been wanting to experiment with freeze dried eggs but I haven’t yet tested that in this recipe. I will make updates on the blog post if I have success with that.
Awesome, thanks 😀
I’m very interested in trying this recipe! I don’t have a mixer, but I do have a bread machine. Would this work if I used the dough setting on the machine to knead/rise? Then I could take out of the machine for the final rise, then bake? Or is it the exact process that makes this bread so great? Thank you, I’m pretty new to this whole process so I’m looking forward to learning a lot!
Hi Brandy,
The exact process and ingredient ratios is what makes this bread recipe work. I haven’t tested this recipe with a bread machine yet. However, I used a bread machine with a different recipe for many years prior to developing this recipe. In my experience bread machines tend to over ferment the dough. Especially, when using fresh milled flour. Over fermenting can cause the bread to become crumbly. However, I encourage you to experiment with this recipe in a bread machine. It’s important to find a process and recipe that works best for your lifestyle.
Hi Brandy, I recently posted a bread machine version of this recipe. You can find it in the fresh milled flour recipe section of my blog or just use the search bar of my blog.
Where might I buy the red bowl with the handle you poured your flour from? I didn’t see it listed. Can’t wait to try this recipe. I’m going to order the cast iron bread pans, too!
Hi Chalease, I wish I could give you a link to the red bowl but I don’t have one. It’s an item I’ve used in my kitchen for quite some time. I don’t even remember where I got it from. Happy Baking!
Hello, I’m excited to try this recipe but my cast iron pans are 9×5 (measured from the inside capacity).
Could I still use this recipe with your exact measurements or would the pan be too large?
Thank you 🙂
Hi Kristie, You will get great loaves using two 9×5 cast iron loaf pans. No adjustment to the recipe needed.
I would live to convert this to sourdough and ideas?
Yes. I am working on a sourdough sandwich bread post to be released in the near future. You can follow me on social media or sign up for my newsletter for the latest updates on new blog post.