Ingredients
Method
Mixing:
- Firstly, measure 660 grams of hard wheat berries. I like to use 473 grams of hard white and 187 grams of Khorasan. If you don’t have Khorasan, you can use all hard white. Hard red wheat berries are another great option.
- Secondly, mill the wheat berries through your grain mill on a fine setting. If you have trouble getting all the flour to move through your mill, you may need to weigh out one or two grams extra of wheat berries. This will account for any loss you may experience in the milling process. Once you have the flour freshly milled, add 11.5 grams (2 tsp) of salt and 26 grams (¼ cup) of dry milk powder to the flour and gently mix with a spoon. Then set aside.
- Tip: If you don’t have milk powder, you may omit it, but you will need to substitute the water for milk.
- Thirdly, measure 418 grams of water and warm until it’s approximately 95° F to 105°F. This can be done by placing it in the microwave for approximately 45 seconds. Add water, 39 grams of olive oil, 85 grams of honey, and 1 room temperature egg to a stand mixer. Mix the liquid ingredients. Start out at a low speed and then slowly increase the speed to medium until all the wet ingredients are well mixed.
- Once the wet ingredients are mixed, gradually add the freshly milled flour mixture. Mix on a low to medium speed just until all the flour is no longer dry. It should only take one to two minutes. Don’t over mix at this point. You’re just trying to get the flour wet at this stage.
Autolysing:
- Next, cover and let rest for 1 hour.
Kneading:
- After the dough has autolysed for one hour, add 2 1/2 tsp instant yeast. I like to use saf–instant. Then, knead in your stand mixer until you have reached a windowpane. Trust the process and DO NOT add any extra flour at this point. When you first start mixing this is a very wet dough. It will come together. As you start to knead you will see the dough strengthen. It will begin to ball up and become one cohesive unit. The kneading process will be done when you reach the windowpane stage.
Bulk fermenting:
- Next, lightly oil your proofing container to prevent sticking. A see through container with straight sides works best. Then, transfer your dough to the proofing container. Cover and let rest in a warm place until it increases by about 80%.
Prepare the baking sheet:
- While you are waiting for your dough to ferment, prepare the baking sheet. I prefer to place a piece of parchment paper or an oven safe silicone mat on the baking sheet. If you won’t be using either of these options, you will want to grease your baking sheet with unsalted butter.
Shaping the dough:
- Once the dough has risen 80%, turn the dough out onto a lightly oiled work surface. Lightly oil the dough scraper and rolling pin. Divide the dough into 24 equal pieces. If you only want to make 12 knots, cut dough in half, then take half the dough and divide into 12 equal pieces. You can shape the other half of the dough into my soft sandwich bread or one of my other basic dough recipes.
- After you have equal size portions; shape the knots. Do this by rolling each piece of dough into a rectangle shape. It should be approximately 10 inches wide by 2 inches tall. This does not have to be perfect. Next, roll the dough along the 10-inch-wide side into a cylinder shape. Then, pinch the ends together. Next, roll the cylinder shaped dough back and forth across your work surface to even the dough out. Subsequently, this will create surface tension. Next, tie the dough into a knot. Tuck the end under the knot and place on the prepared baking sheet. Repeat shaping for all 24 knots.
Proofing:
- Once all the knots are shaped, cover and let them sit in a warm place to rise for about 15 minutes. You don’t want to over proof the dough here. They will be puffy, but they won’t be doubled in size. While the knots are proofing, preheat the oven to 350°F.
Prepare dill butter garlic topping:
- In a small pan on low heat melt 70 grams of unsalted butter. Add 1.5 g garlic powder, 6 g salt, and 1.2 g dried dill. Stir until mixed. Remove from heat.
- Tip: If you prefer to use a microwave instead of a stove, add all ingredients to a small dish and warm in the microwave for 10-20 seconds at a time until all the butter is melted. Then, stir until all ingredients are well mixed.
Baking:
- Next, remove the cover from knots. Place in the oven and bake at 350° for 20 minutes. Once fully baked, the internal temperature should be at least 195°.
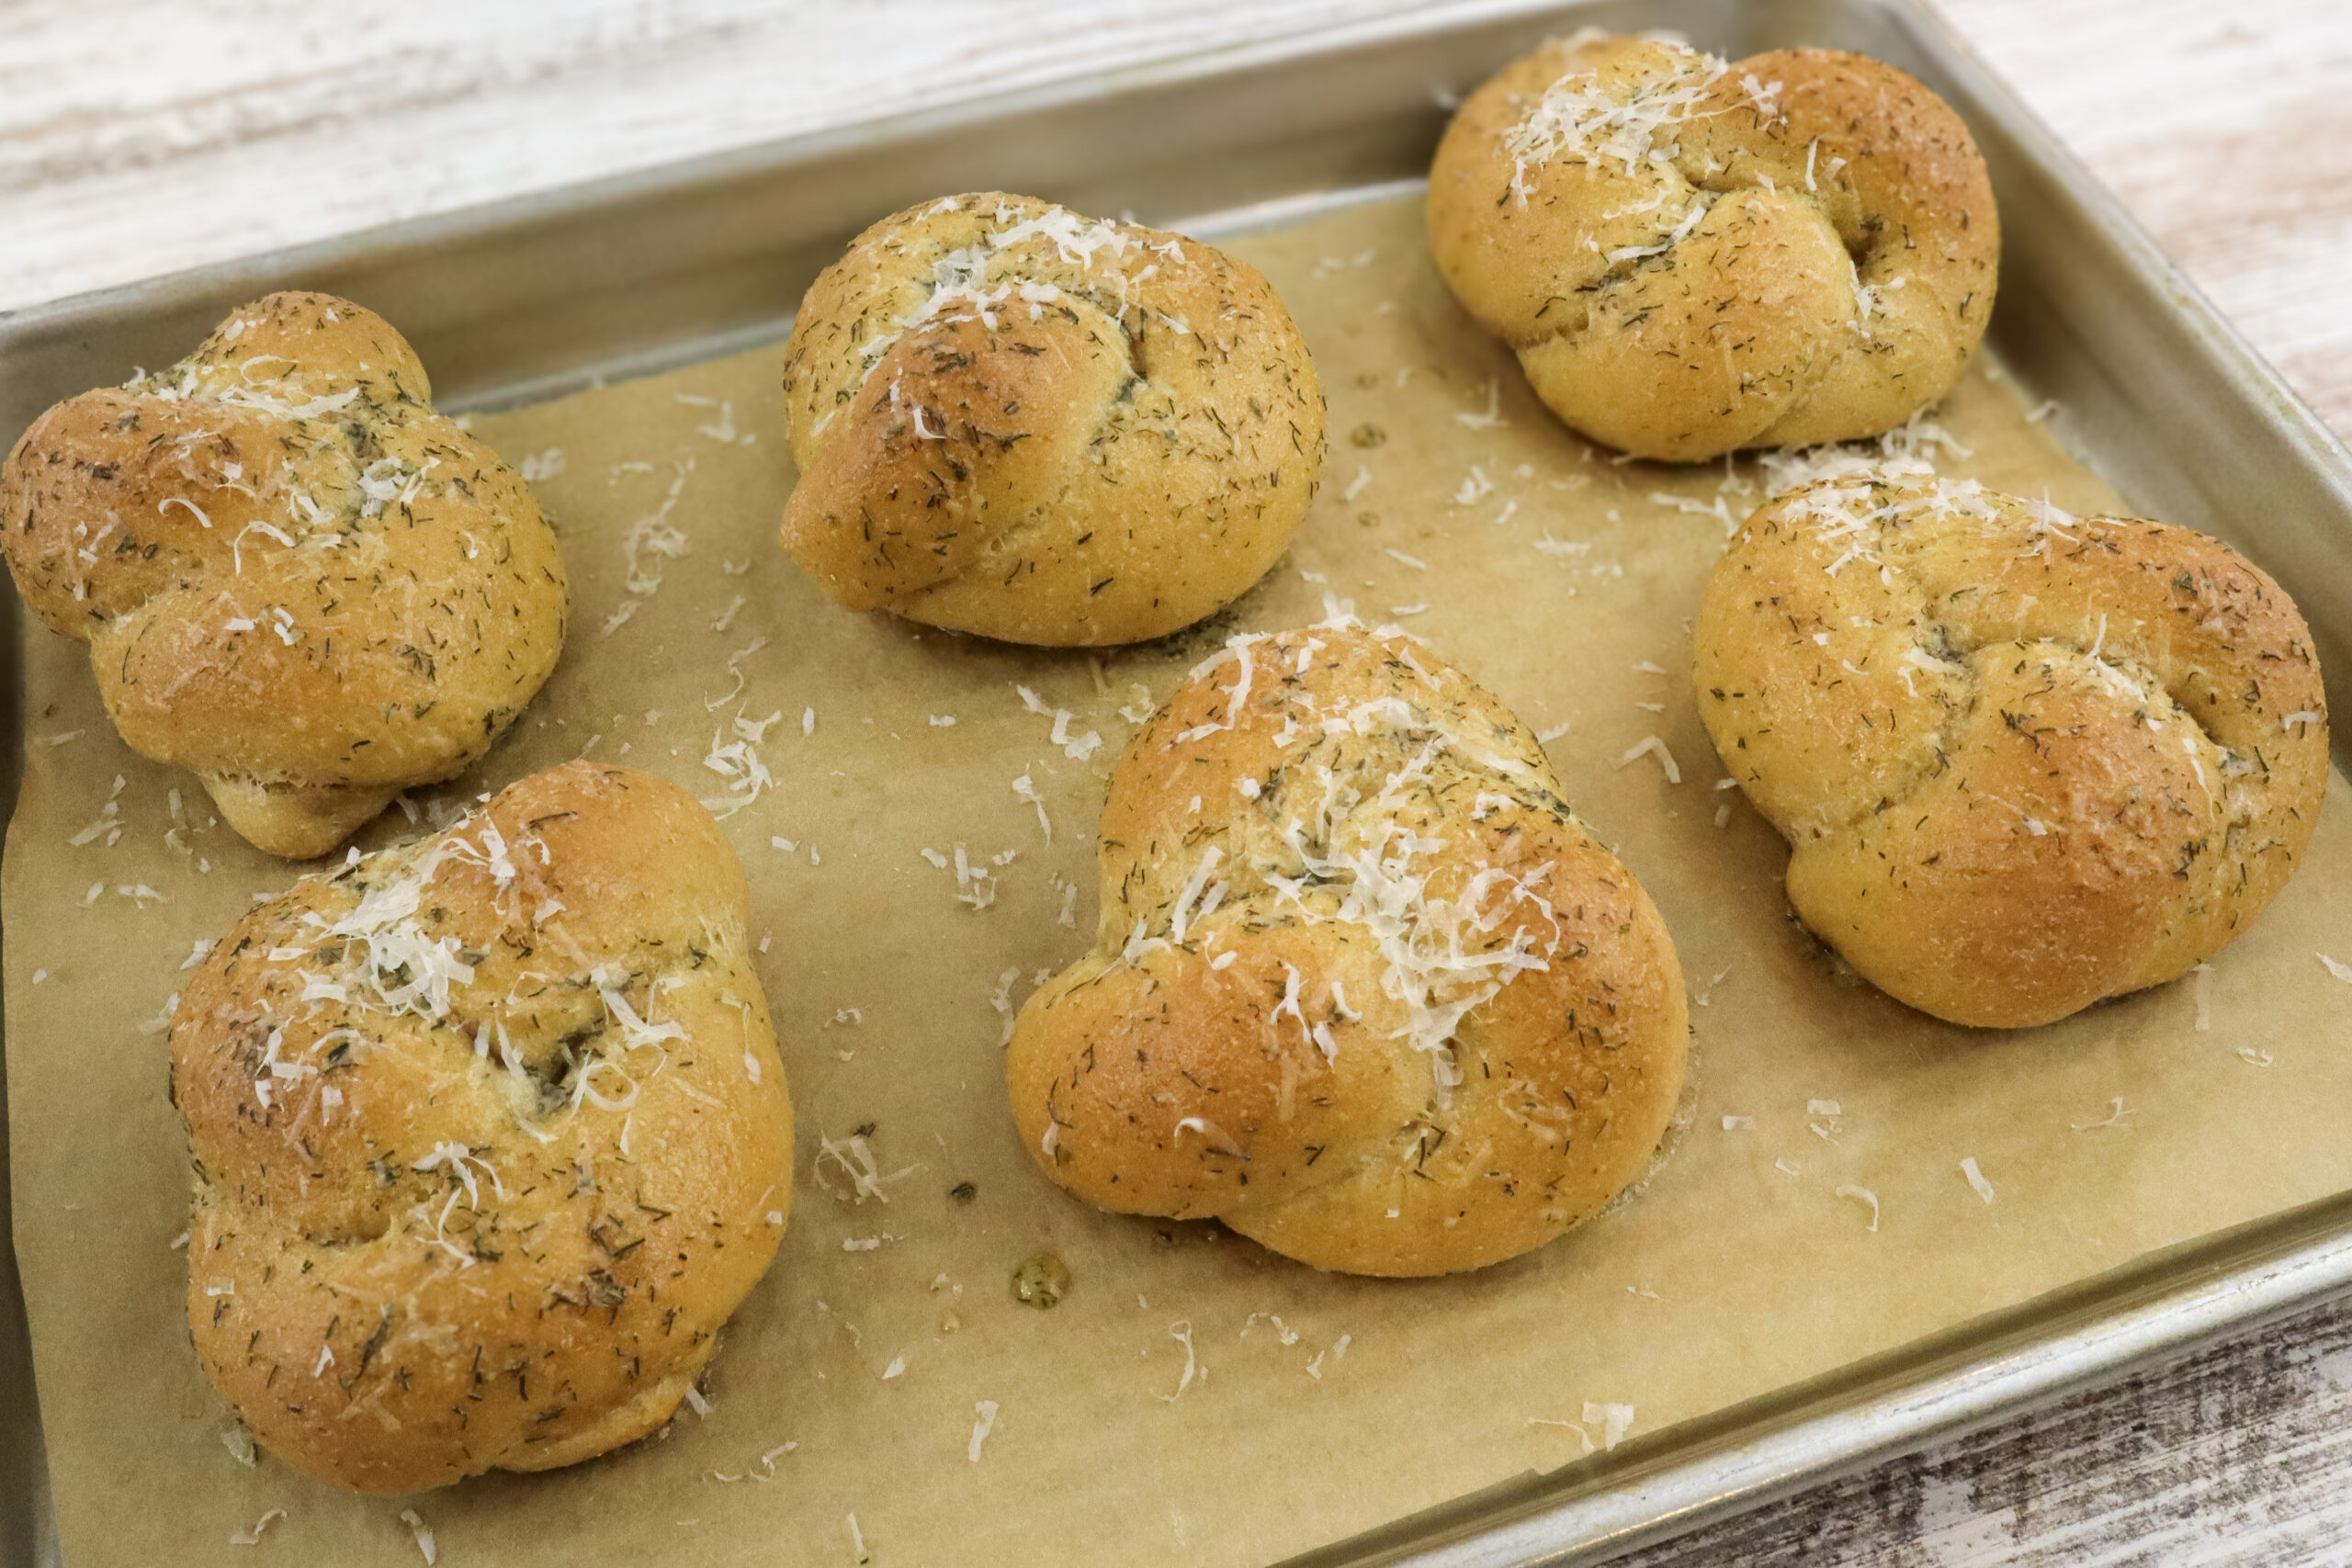
Topping the garlic knots:
- Lastly, remove from the oven and brush hot garlic knots with melted dill butter garlic mixture. Then, freshly zest parmesan cheese on top to your taste.