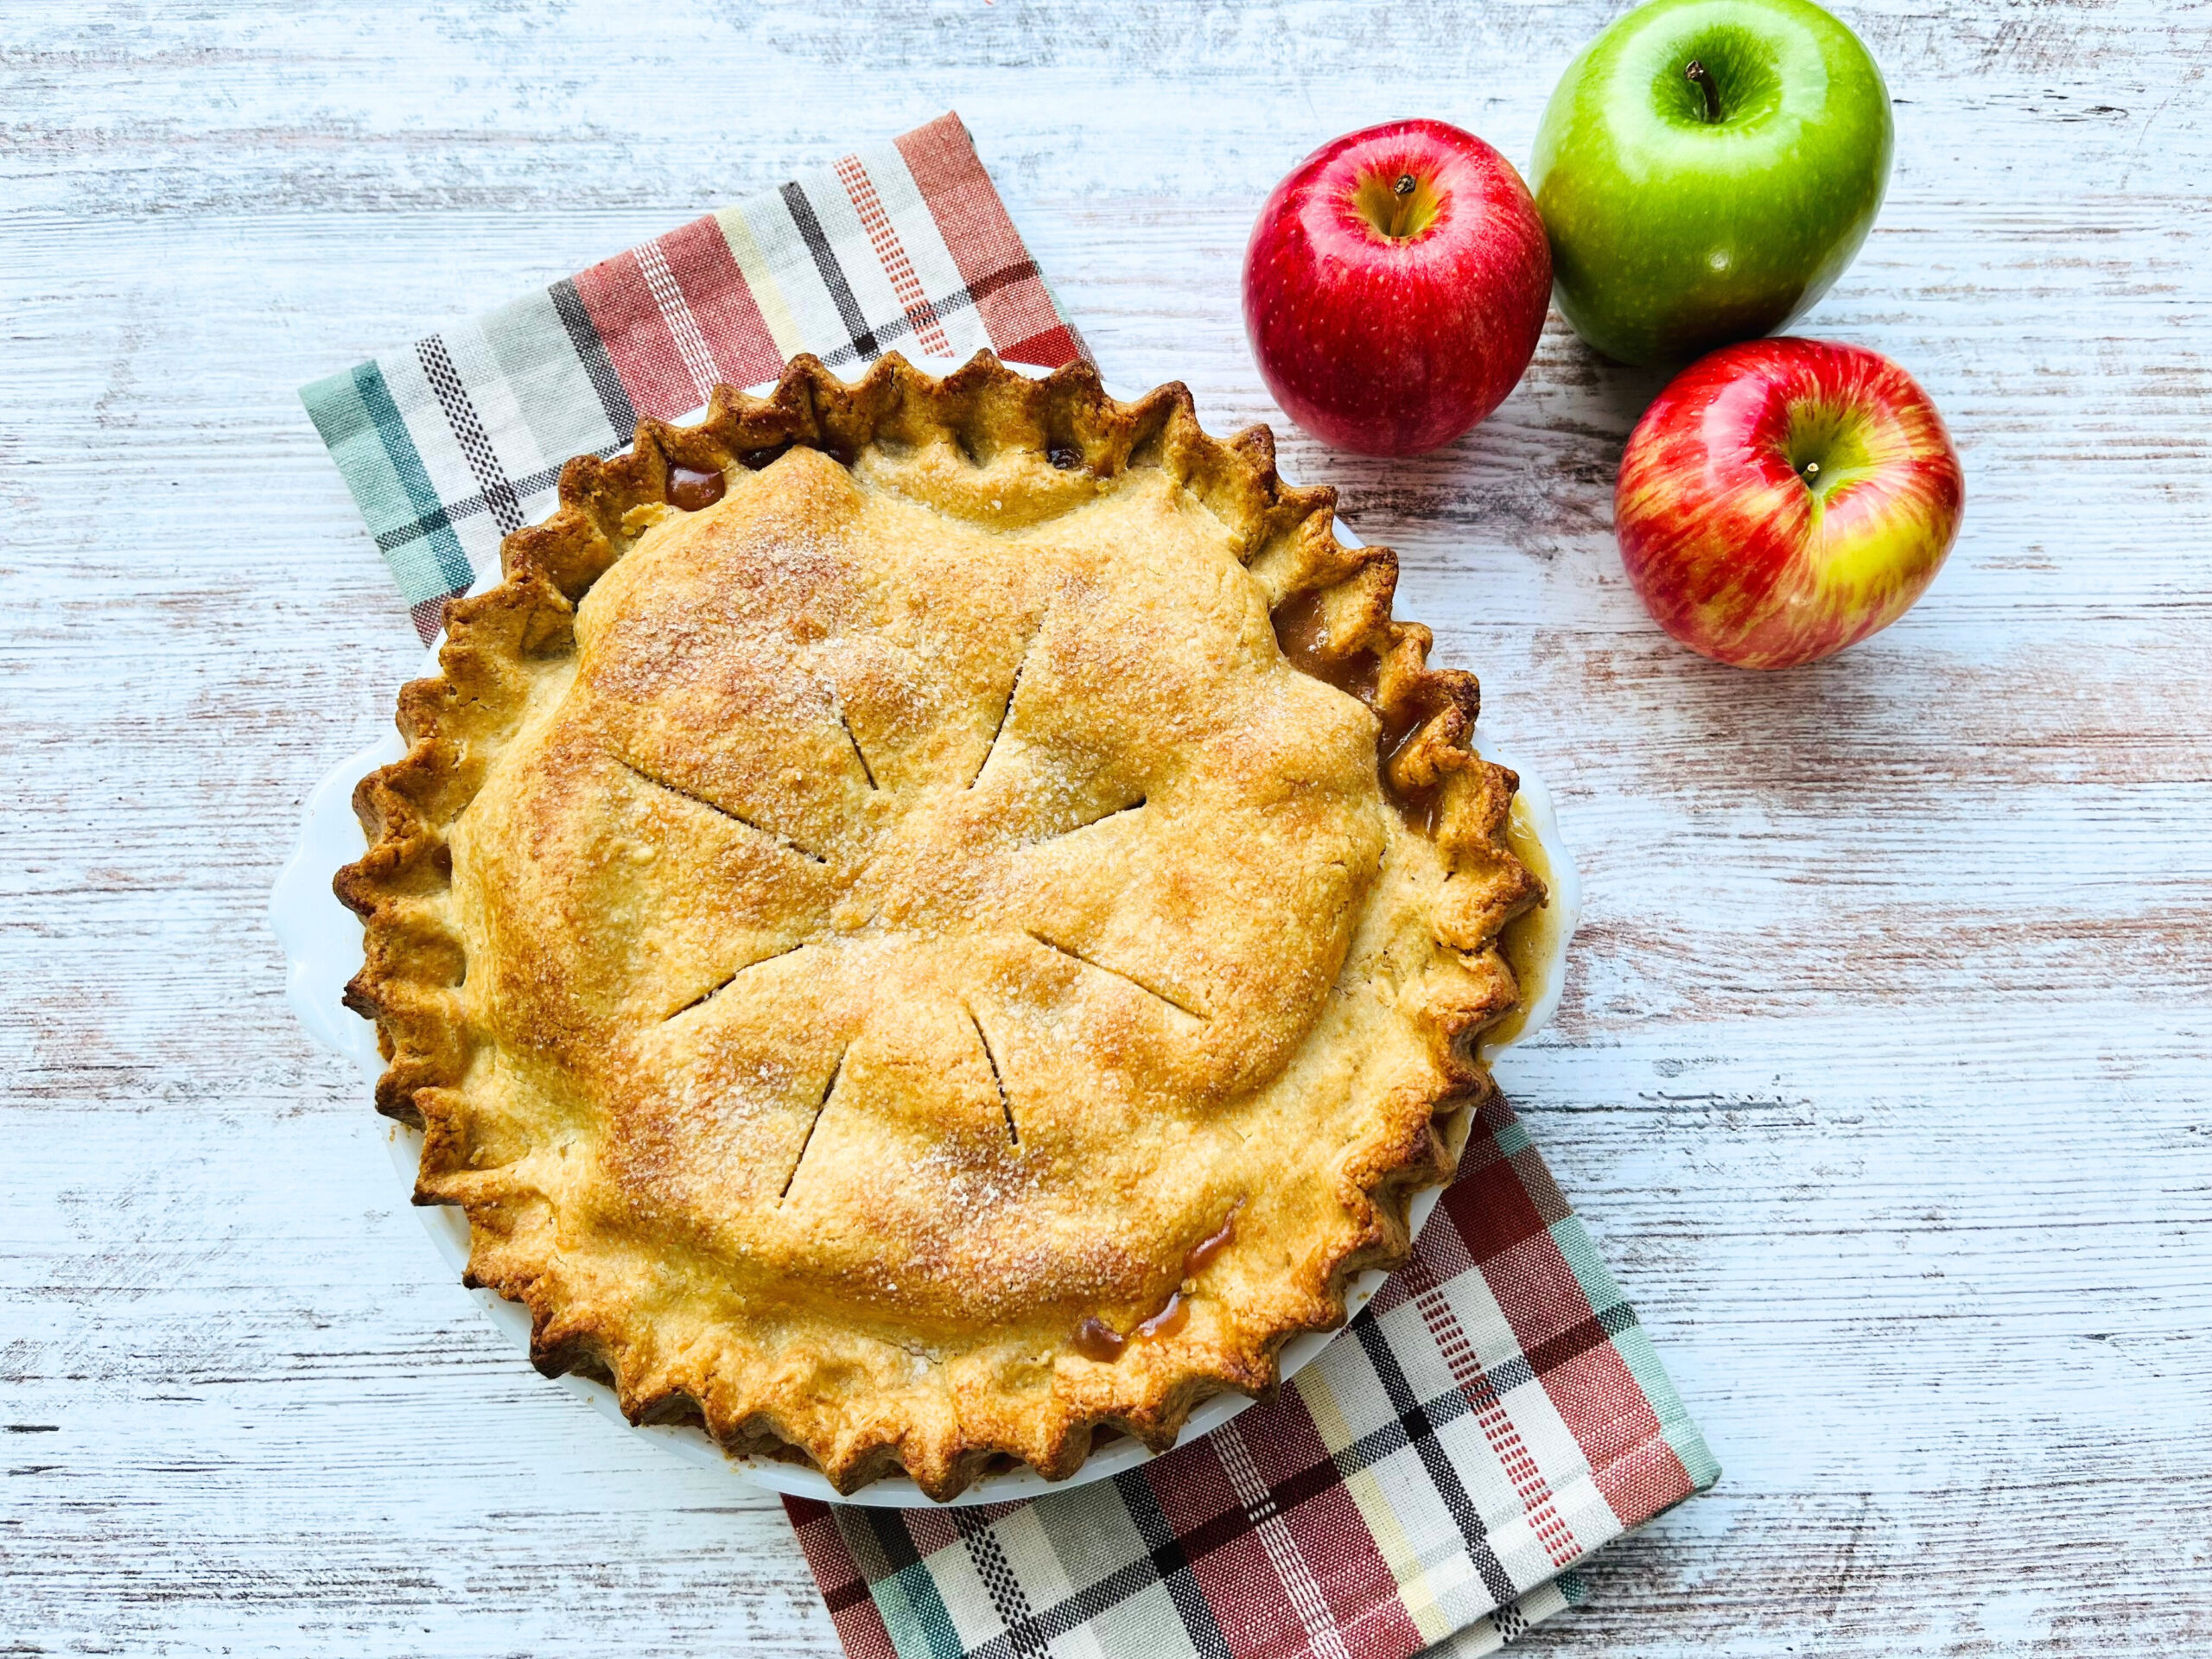
Sweet Apple Pie Made with Fresh Milled Flour

This apple pie made with fresh milled flour is a cherished Fall favorite at our home. The taste is simply divine. The warm, inviting aroma of cinnamon wafting through the house as it bakes creates a cozy, heartwarming atmosphere. It etches memories of home in the minds of my family, that will last a lifetime.
To get started on this apple pie you will need a pie crust. I always use my Traditional Pie Crust Made with Freshly milled flour. You can check out the full recipe and all the tips and tricks on how to make the best pie crust in my post here:
Traditional Pie Crust Made with Fresh Milled Flour
Transform your pie baking with freshly milled flour. Follow our tips to create a crust that enhances your favorite pies.
Sweet Apple Pie Ingredients:
Traditional Pie Crust Made with Fresh Milled Flour
55 grams of wheat berries (soft white or your choice)
1 Tablespoon lemon juice
2 ½ pounds of apples cored, peeled and thinly sliced (approximately 3 lbs. of apples before coring and peeling or 5-7 whole apples)
1 1/4 teaspoon of cinnamon
¼ teaspoon salt
65 grams of brown sugar
108 grams of white granulated white sugar
1 teaspoon of room temperature butter
2 teaspoons of milk
1 teaspoon of white granulated sugar (optional)
*This post contains affiliate links. Please see full disclosure for details.
Step 1:
Preheat the oven to 450°F.
Step 2:
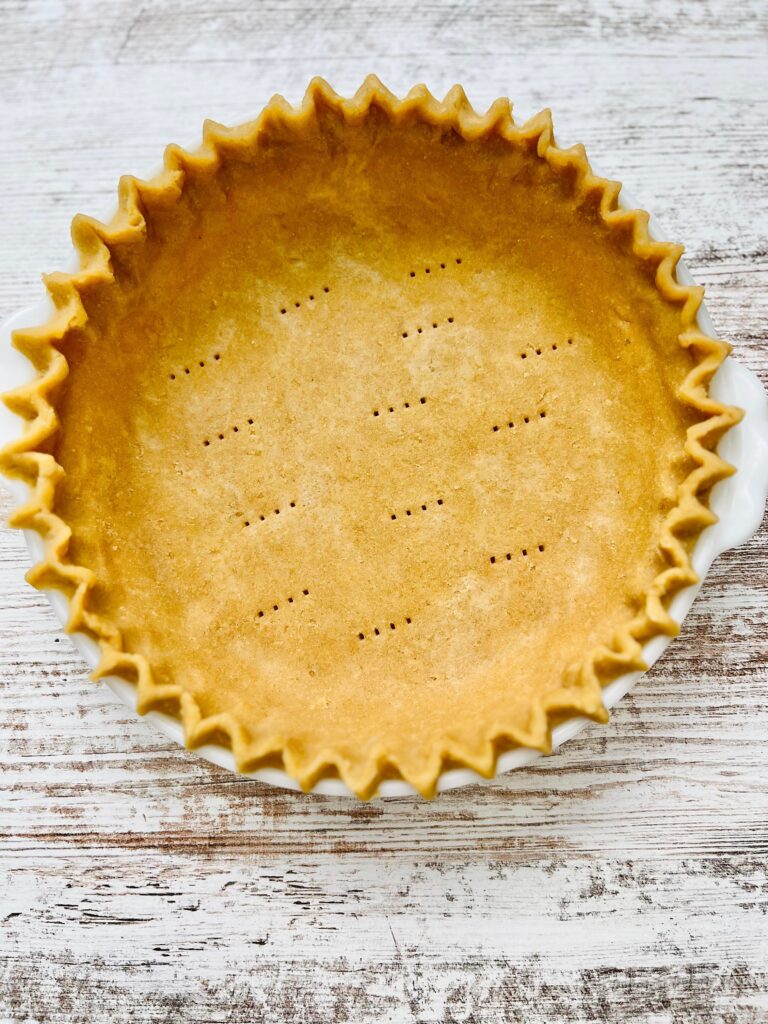
Prepare 2 layers of traditional pie crust made with freshly milled flour. (See Grandma’s Iron Skillet Traditional Pie Crust Recipe for step-by-step instructions.)
Step 3:
While the pie crust is chilling in the refrigerator, prepare the pie plate by generously greasing the bottom and side with 1 teaspoon of room temperature butter.
Step 4:
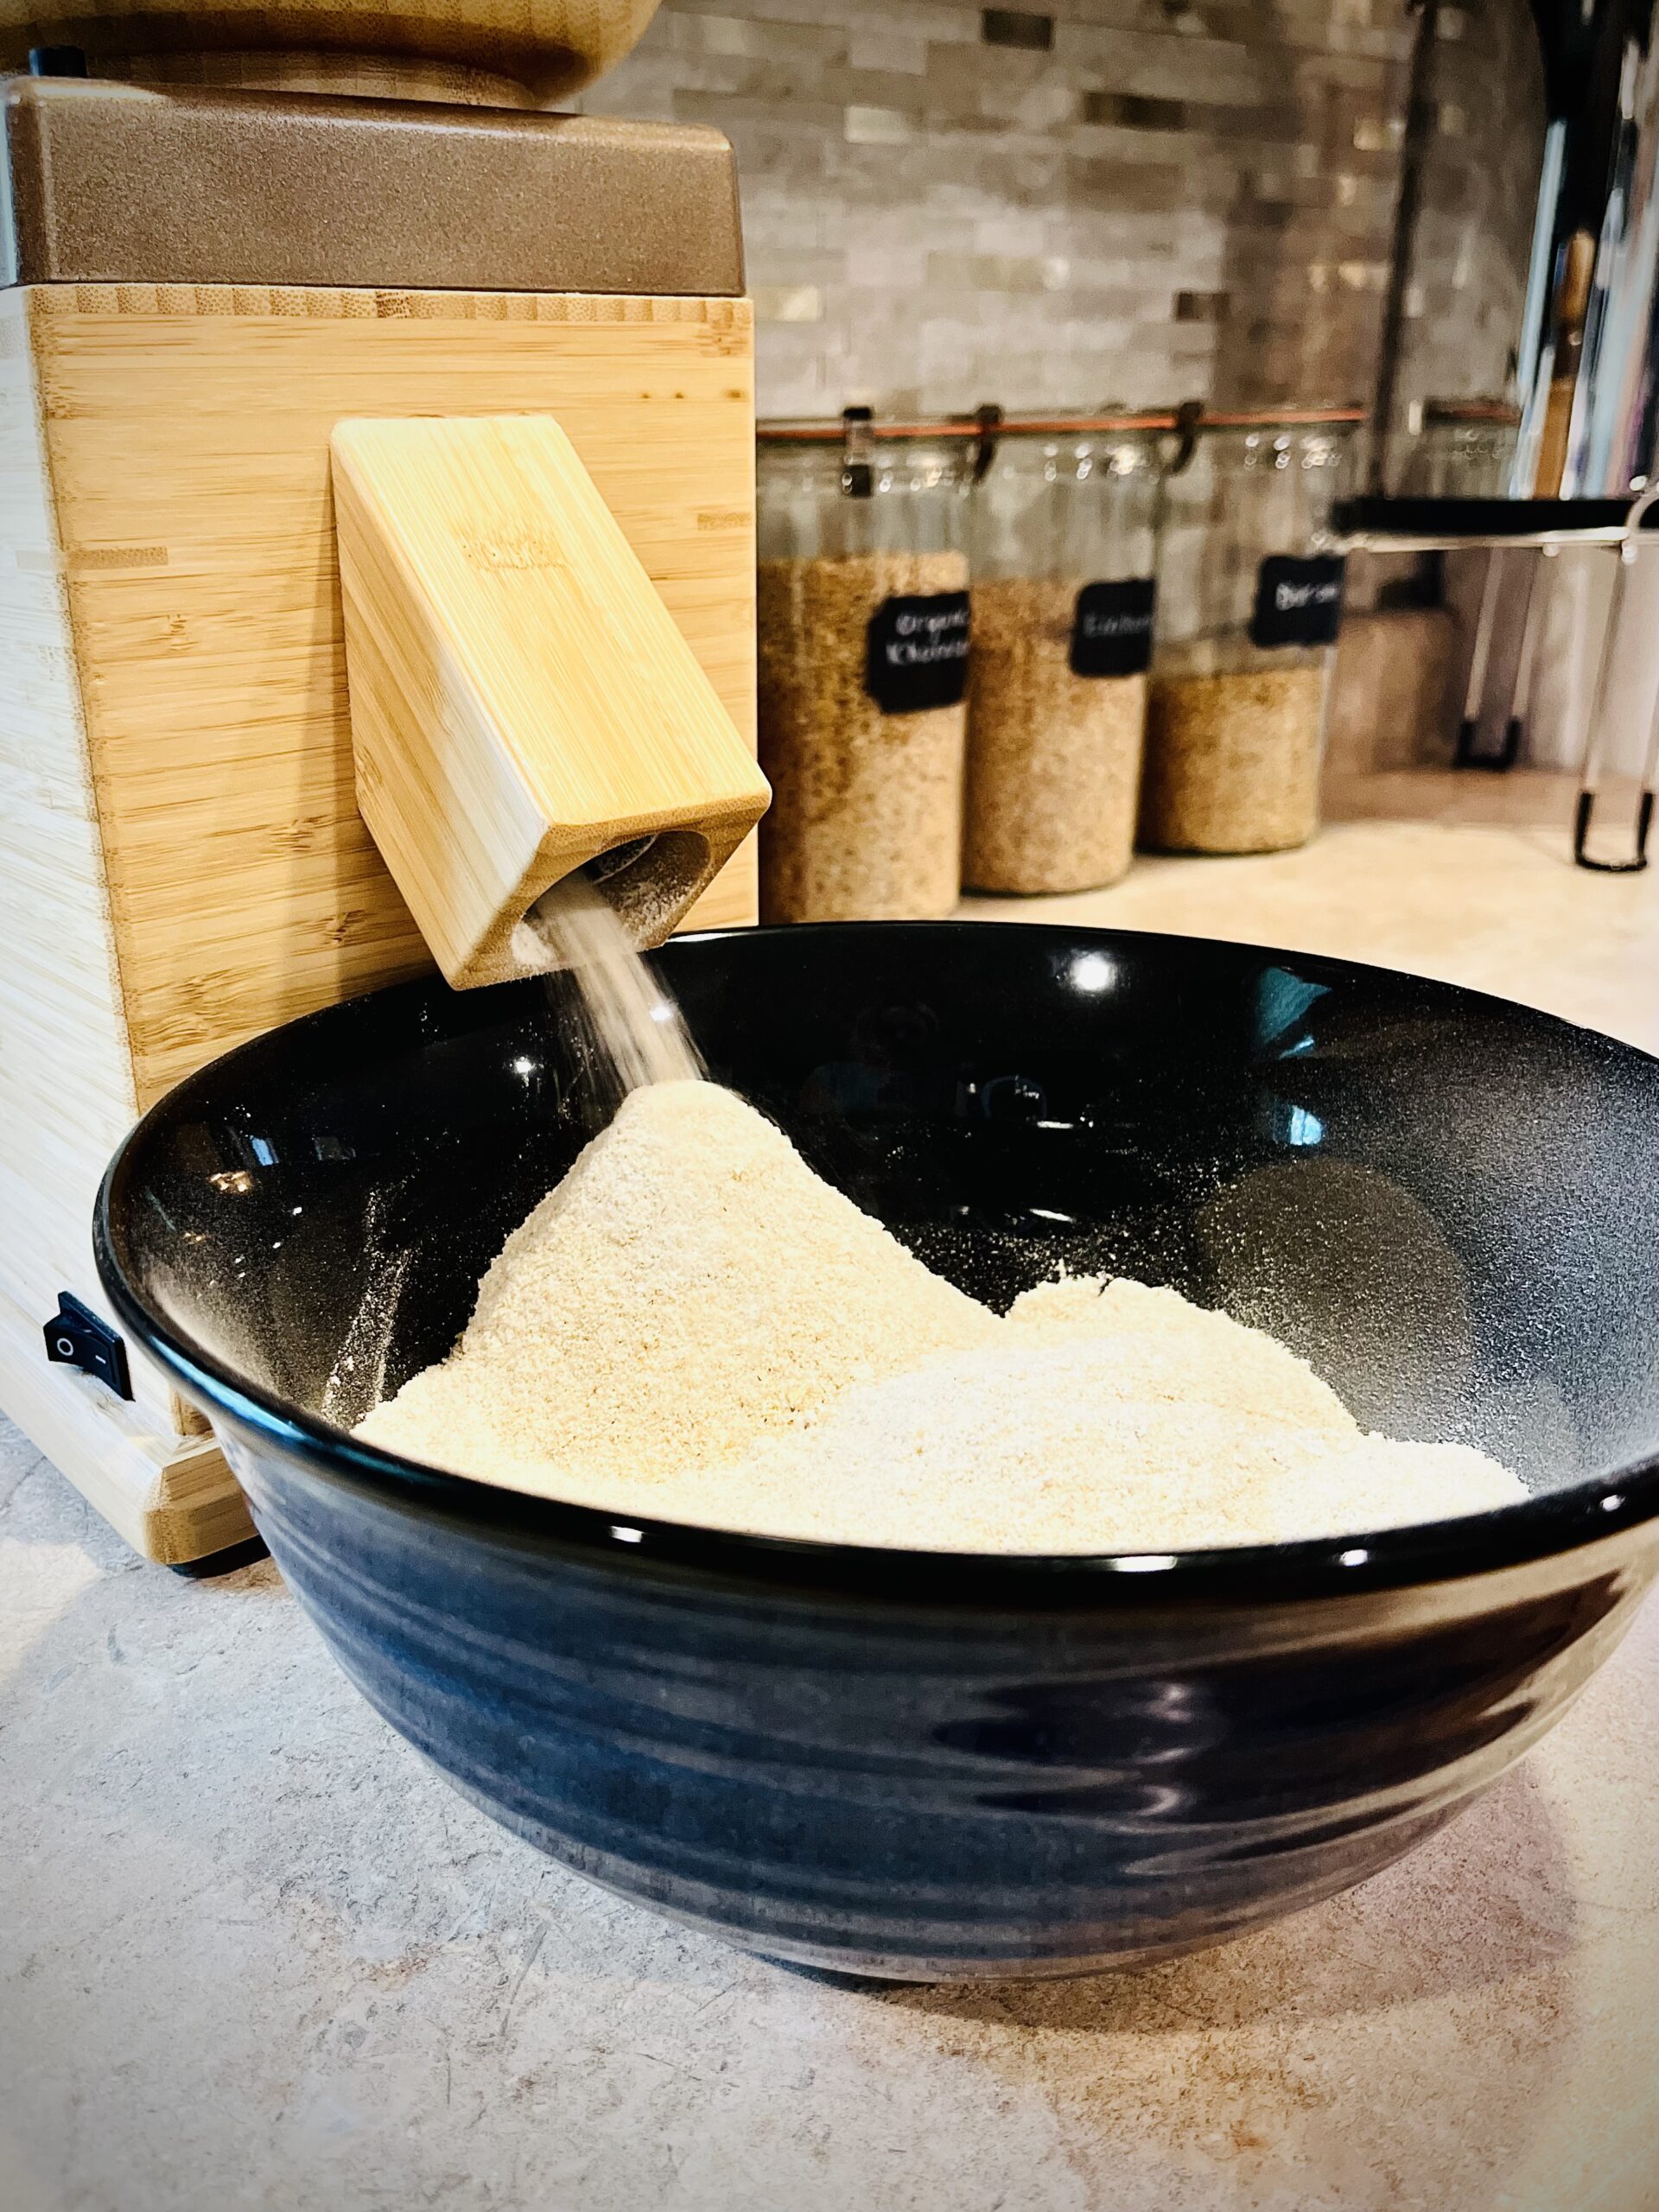
Measure 55 grams of wheat berries of your choice. I use soft white wheat berries. Next, run the wheat berries through a grain mill on a fine setting to create freshly milled flour.
Step 5:
Add sugar, brown sugar, cinnamon, and salt to the freshly milled flour. Mix gently with a spoon. Set the dry mixture aside.
Step 6:
Next, core, thinly slice and peel apples. It’s important to slice the apples thin as this helps to raw pack them in the pie with less air pockets. They will shrink as they cook. The fewer the air pockets in the filling, the fuller and prettier the pie will be after baking. You will need 2 1/2 pounds of sliced and peels apples. Depending on the size, 2 1/2 pounds of peeled and sliced apples equals about 5-7 whole apples.
Tip:
For the best flavor, I like to use a mix of sweet and tart apples. My favorite varieties include a mix of Braeburn, Granny Smith, and Honey Crisp.
Step 7:
After the apples are prepared, add lemon juice and toss. The apples will have a light coating of lemon juice to prevent them from turning browning or oxidizing.
Step 8:
Add the dry mixture to the apples and toss until the apples are evenly coated.
Step 9:
Remove the pie crust from the refrigerator and allow it to sit on the counter at room temperature for about 5 minutes. This will soften the pie crust to prevent it from cracking. If the pie crust isn’t pliable enough to bend without breaking, allow it to sit for a few minutes longer. Then, place the fresh milled flour crust on the bottom of a greased pie plate. Gently shape the crust to mold the bottom of the plate.
Step 10:
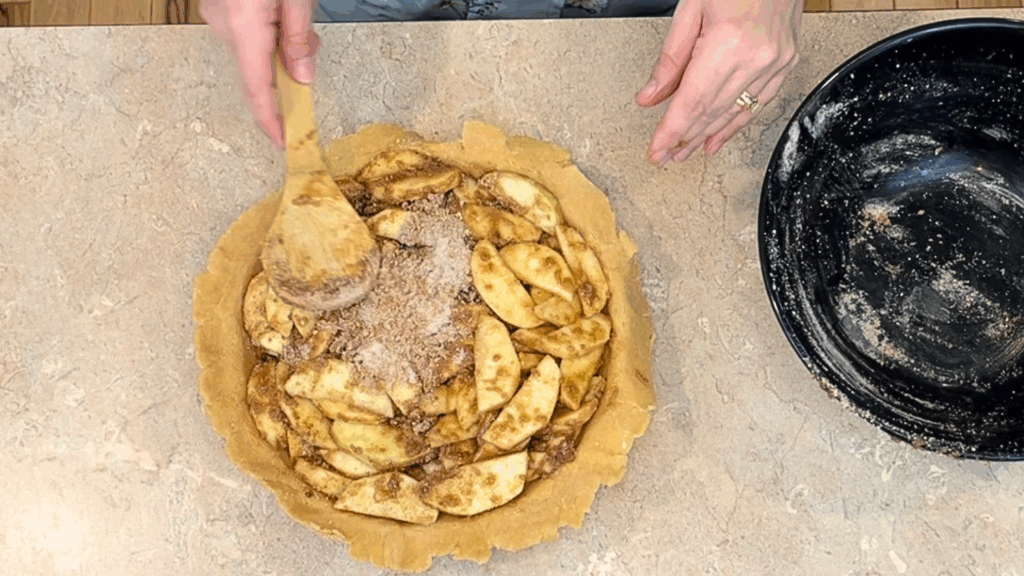
Next, add the raw apple mixture to the pie plate. Gently pat the apples down and rearrange apples as needed to fill in as many air pockets as possible.
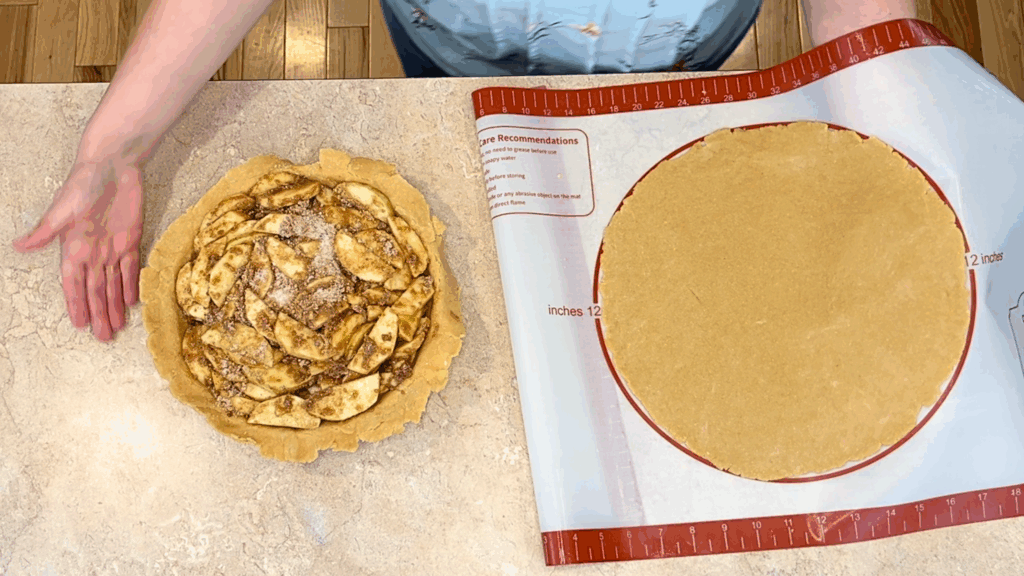
Step 11:
Place the second layer of fresh milled flour pie crust on top of the apples. Pinch both layers of pie crust together along the edge of the pie plate then fold over excess pie crust. After that, flute the edges of the crust.
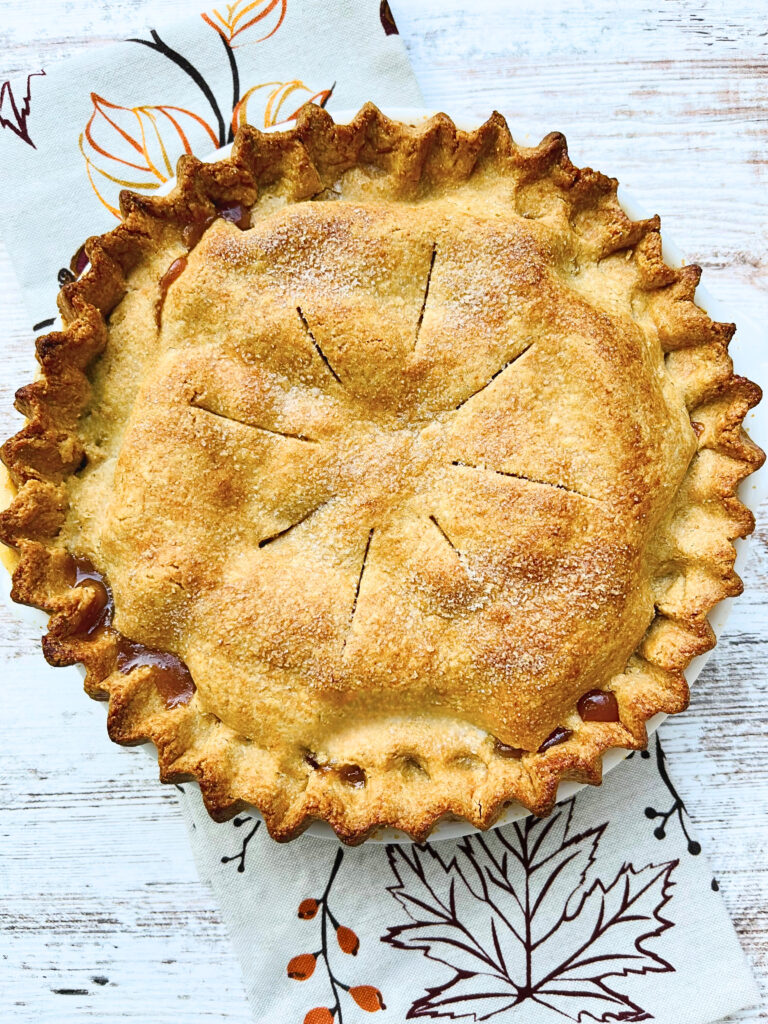
Step 12:
With a paring knife, cut slits into the top of the pie crust to vent the pie. Then, brush the top of the pie with a thin layer of milk. Sprinkle with sugar if desired. I also like to add a light sprinkle of cinnamon on top, but this is completely optional.
Step 13:
Bake in a preheated oven at 450°F for 15 minutes. Then, without opening the oven, reduce the heat to 375°F and bake for an additional 45 minutes. If the top or edges of the pie crust start to get too brown you can lightly cover them with aluminum foil.
Tip:
I like to place a cooking sheet on the lower rack of my oven. Sometimes a little bit of pie filling may bubble over and seep out. This prevents any filling from getting on the bottom of the oven and burning.
Remove pie from the oven and let it cool completely before cutting. Although, at our house, we sometimes cut into a little bit sooner, simply because we just can’t wait for that first mouthwatering bite.
Shop This Post:
This post contains affiliate links. As an Amazon Associate, if you click and make a purchase, I may earn a small commission at no extra cost to you. Rest assure, I only recommend products I have personally used and genuinely love, so you’re in good hands.
Use code GRANDMA20 to get $20 off Bosch Mixers, Artiste, and Magimix
John Boos RA-Board Series Rectangular Wooden Maple Cutting Board 24”x18” – 2.25” Thick, 30-lb Reversible Butcher Block with Edge-Grain & Finger Grips – Made in the USA
WÜSTHOF 8″ Gourmet Chef’s Knife, Black
Jillmo Danish Dough Whisk, 12inch Stainless Steel Bread Whisk
Silicone Baking Mat, Non Stick Pastry Mat Sheet for Dough Rolling, Nonslip Fondant/Pie Crust Mat, Counter Mat Oven Liner Mat for Making Cookies Macarons Bread Baking Supplies Extra Large 26 x 16 Inch
Ceramic Pie Weights Reusable 10mm Baking Beans Pie Crust Weights Natural Ceramic Stoneware with Wheat Straw Container
Brod & Taylor Precision Kitchen & Coffee Scale with Timer | (0.1g Precision)
Hasense Ceramic Serving Bowls, 9 Inch Large Salad Bowls for Kitchen, 84 Ounce Mixing Bowl Set of 2, Ideal for Soup Pho Pasta Popcorn, Dishwasher & Microwave Safe(Blue)
Now Designs Reusable Bowl Cover to Reduce Waste, Ticking Stripe – Large & Medium | Set of 2
Creative Co-Op Black & White Marble Salt & Pepper Pots with Wood Lids (Set of 2 Styles)
Sweet Apple Pie Made with Fresh Milled Flour
Ingredients
Method
- Preheat the oven to 450°F.
- Prepare 2 layers of Traditional Pie Crust made with freshly milled flour. (see Grandma’s Iron Skillet Traditional Pie Crust Recipe)
- While the pie crust is chilling in the refrigerator, prepare the pie plate by generously greasing the bottom and side with 1 teaspoon of room temperature butter.
- Measure 54 grams of wheat berries of your choice. I use soft white wheat berries. Next, run the wheat berries through a grain mill on a fine setting to create freshly milled flour.
- Add sugar, brown sugar, cinnamon, and salt to the freshly milled flour. Mix gently with a spoon. Set the dry mixture aside.
- Next, core, thinly slice and peel apples.
- After the apples are prepared, add lemon juice to the apples and toss.
- Add the dry mixture to the apples and toss until the apples are evenly coated.
- Remove the pie crust from the refrigerator and allow it to sit on the counter at room temperature for about 5 minutes. This will soften the pie crust to prevent it from cracking. If the pie crust isn’t pliable enough to bend without breaking, allow it to sit for a few minutes longer. Then, place the fresh milled flour crust on the bottom of a greased pie plate. Gently shape the crust to mold the bottom of the plate.
- Add the apple mixture to the pie plate. Gently pat the apples down and rearrange apples as needed to fill in as many air pockets as possible.
- Place the second layer of fresh milled flour pie crust on top of the apples. Pinch both layers of pie crust together along the edge of the pie plate then fold over excess pie crust. After that, flute the edges of the crust.
- With a paring knife, cut slits into the top of the pie crust to vent the pie. Then, brush the top of the pie with a thin layer of milk. Sprinkle with sugar if desired. I also like to add a light sprinkle of cinnamon on top, but this is completely optional.
- Bake in a preheated oven at 450°F for 15 minutes. Then, without opening the oven, reduce heat to 375°F and bake for an additional 45 minutes. If the top or edges of the pie crust start to get too brown you can lightly cover them with aluminum foil.

Woah this is next level.