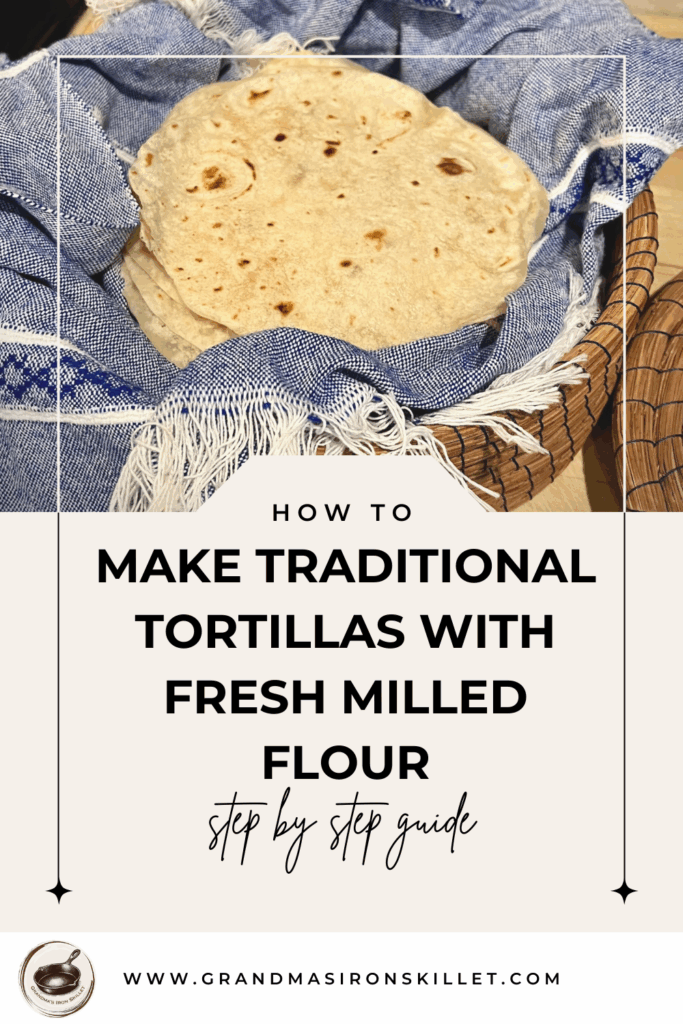
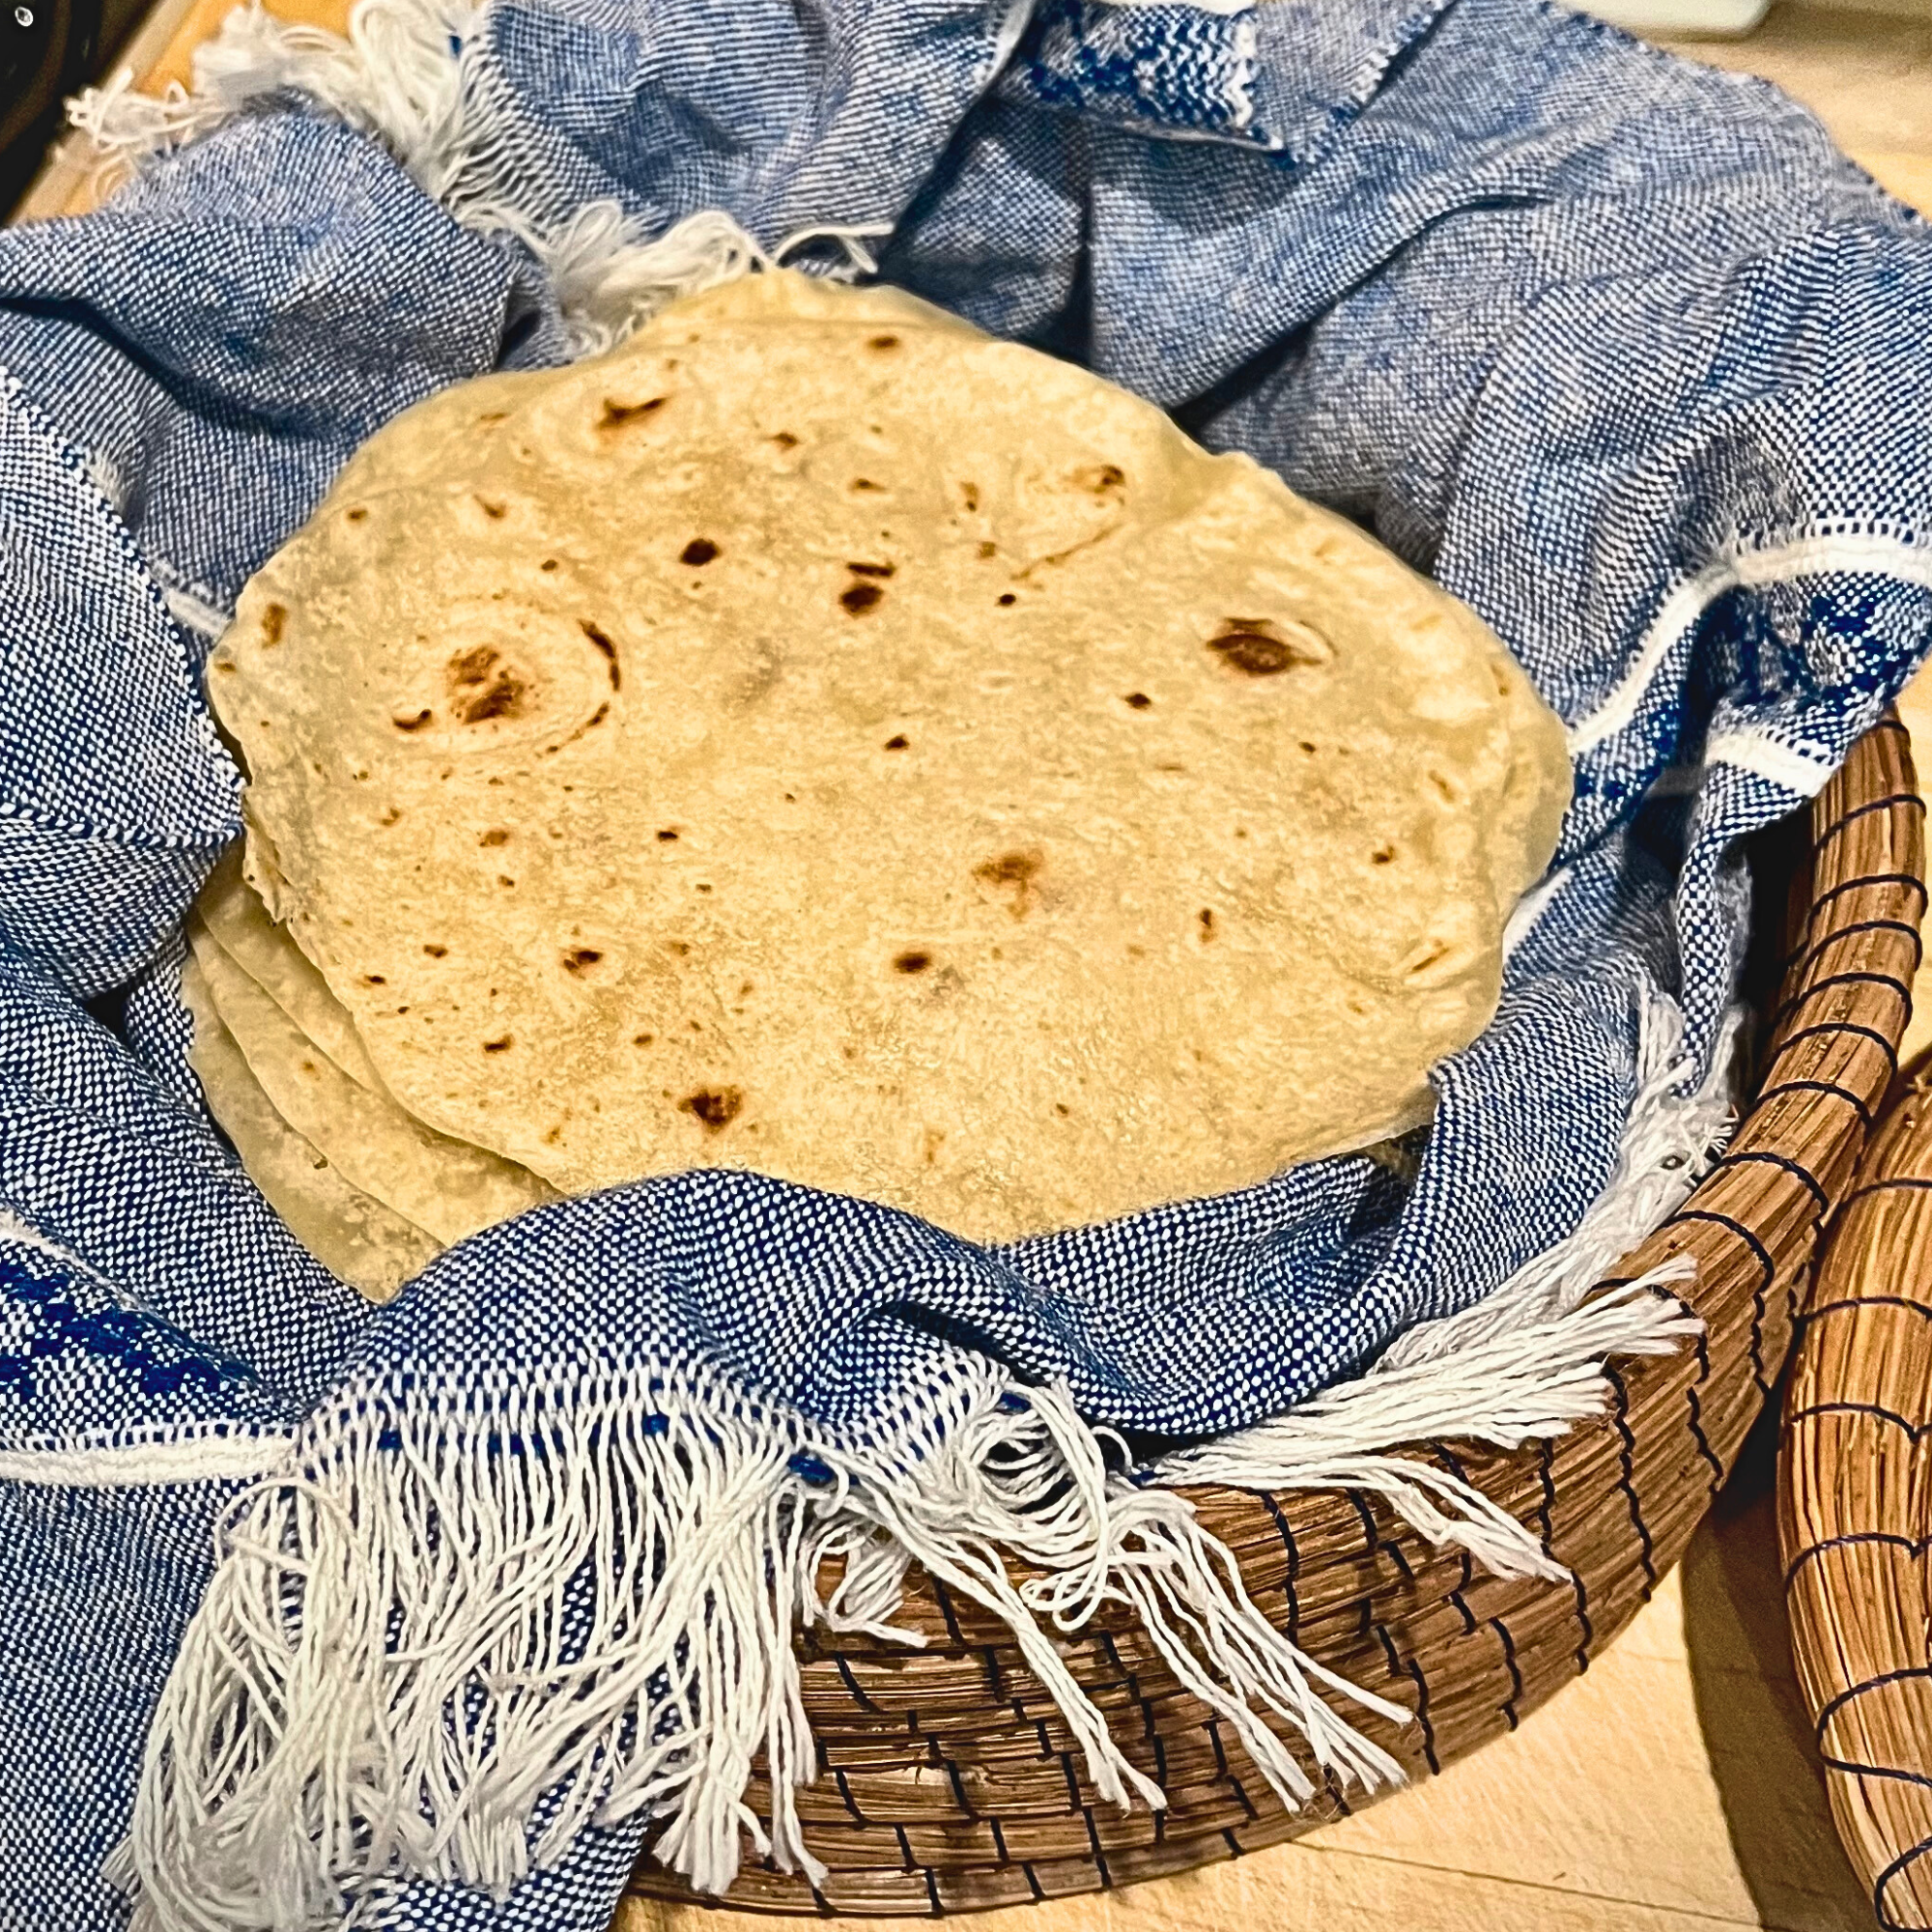
Soft and Flexible Tortillas made with Fresh Milled Flour
Learn How to make soft and flexible tortillas with fresh milled flour.
This recipe is designed specifically for fresh milled flour. You can use this same recipe with store bought flour. The only adjustment you would make is to the resting times. Fresh milled flour needs extra time for the gluten to develop and relax. Store bought flour has the wheat bran and germ sifted out. This process removes the natural nutritional content from the grain. Additionally, oxidizing agents and many other additives have been added to commercial flour that fresh milled flour does not have. However, one of the many benefits to fresh milled flour is that it’s packed with 40 of the 44 essential nutrients required to sustain human life. Commercial flour is high in carbohydrates with very little nutritional value. If you choose to use store bought flour, you can reduce each rest time down to 20 minutes. You’ll get tortillas much faster, but you won’t have the nutritional value that fresh milled flour offers. Fresh milled tortillas can absolutely be soft and pliable, but they need time. The process is not hard and most of the time is resting. This rest time makes it easy to work them into your day. I usually start them in the morning. Then, work through the other activities of my day while the dough is resting. Finishing them just in time for dinner.
*This post contains affiliate links. As an Amazon Associate, I earn from qualifying purchases. If you click and make a purchase, I may earn a small commission at no extra cost to you. Rest assure, I only recommend products I have personally used and genuinely love, so you’re in good hands.
Step-by-step Guide to Making Fresh Milled Flour Tortillas:
There are 9 steps to making fresh milled flour tortillas. Milling, mixing, autolysing (resting), kneading, relaxing (resting), shaping, relaxing (resting), rolling, cooking.
You will need the following ingredients:
500 g hard white wheat berries
6.5 g dry milk powder (1 tablespoon) (may omit of allergic to dairy)
8.5 g baking powder (2 teaspoons)
11.5 g salt (2 teaspoons)
80 g cold lard (6 tablespoons) (may substitute unsalted butter)
326 warm water (1 ½ cups approximate 115°F)
Milling Fresh Milled Flour Tortillas:
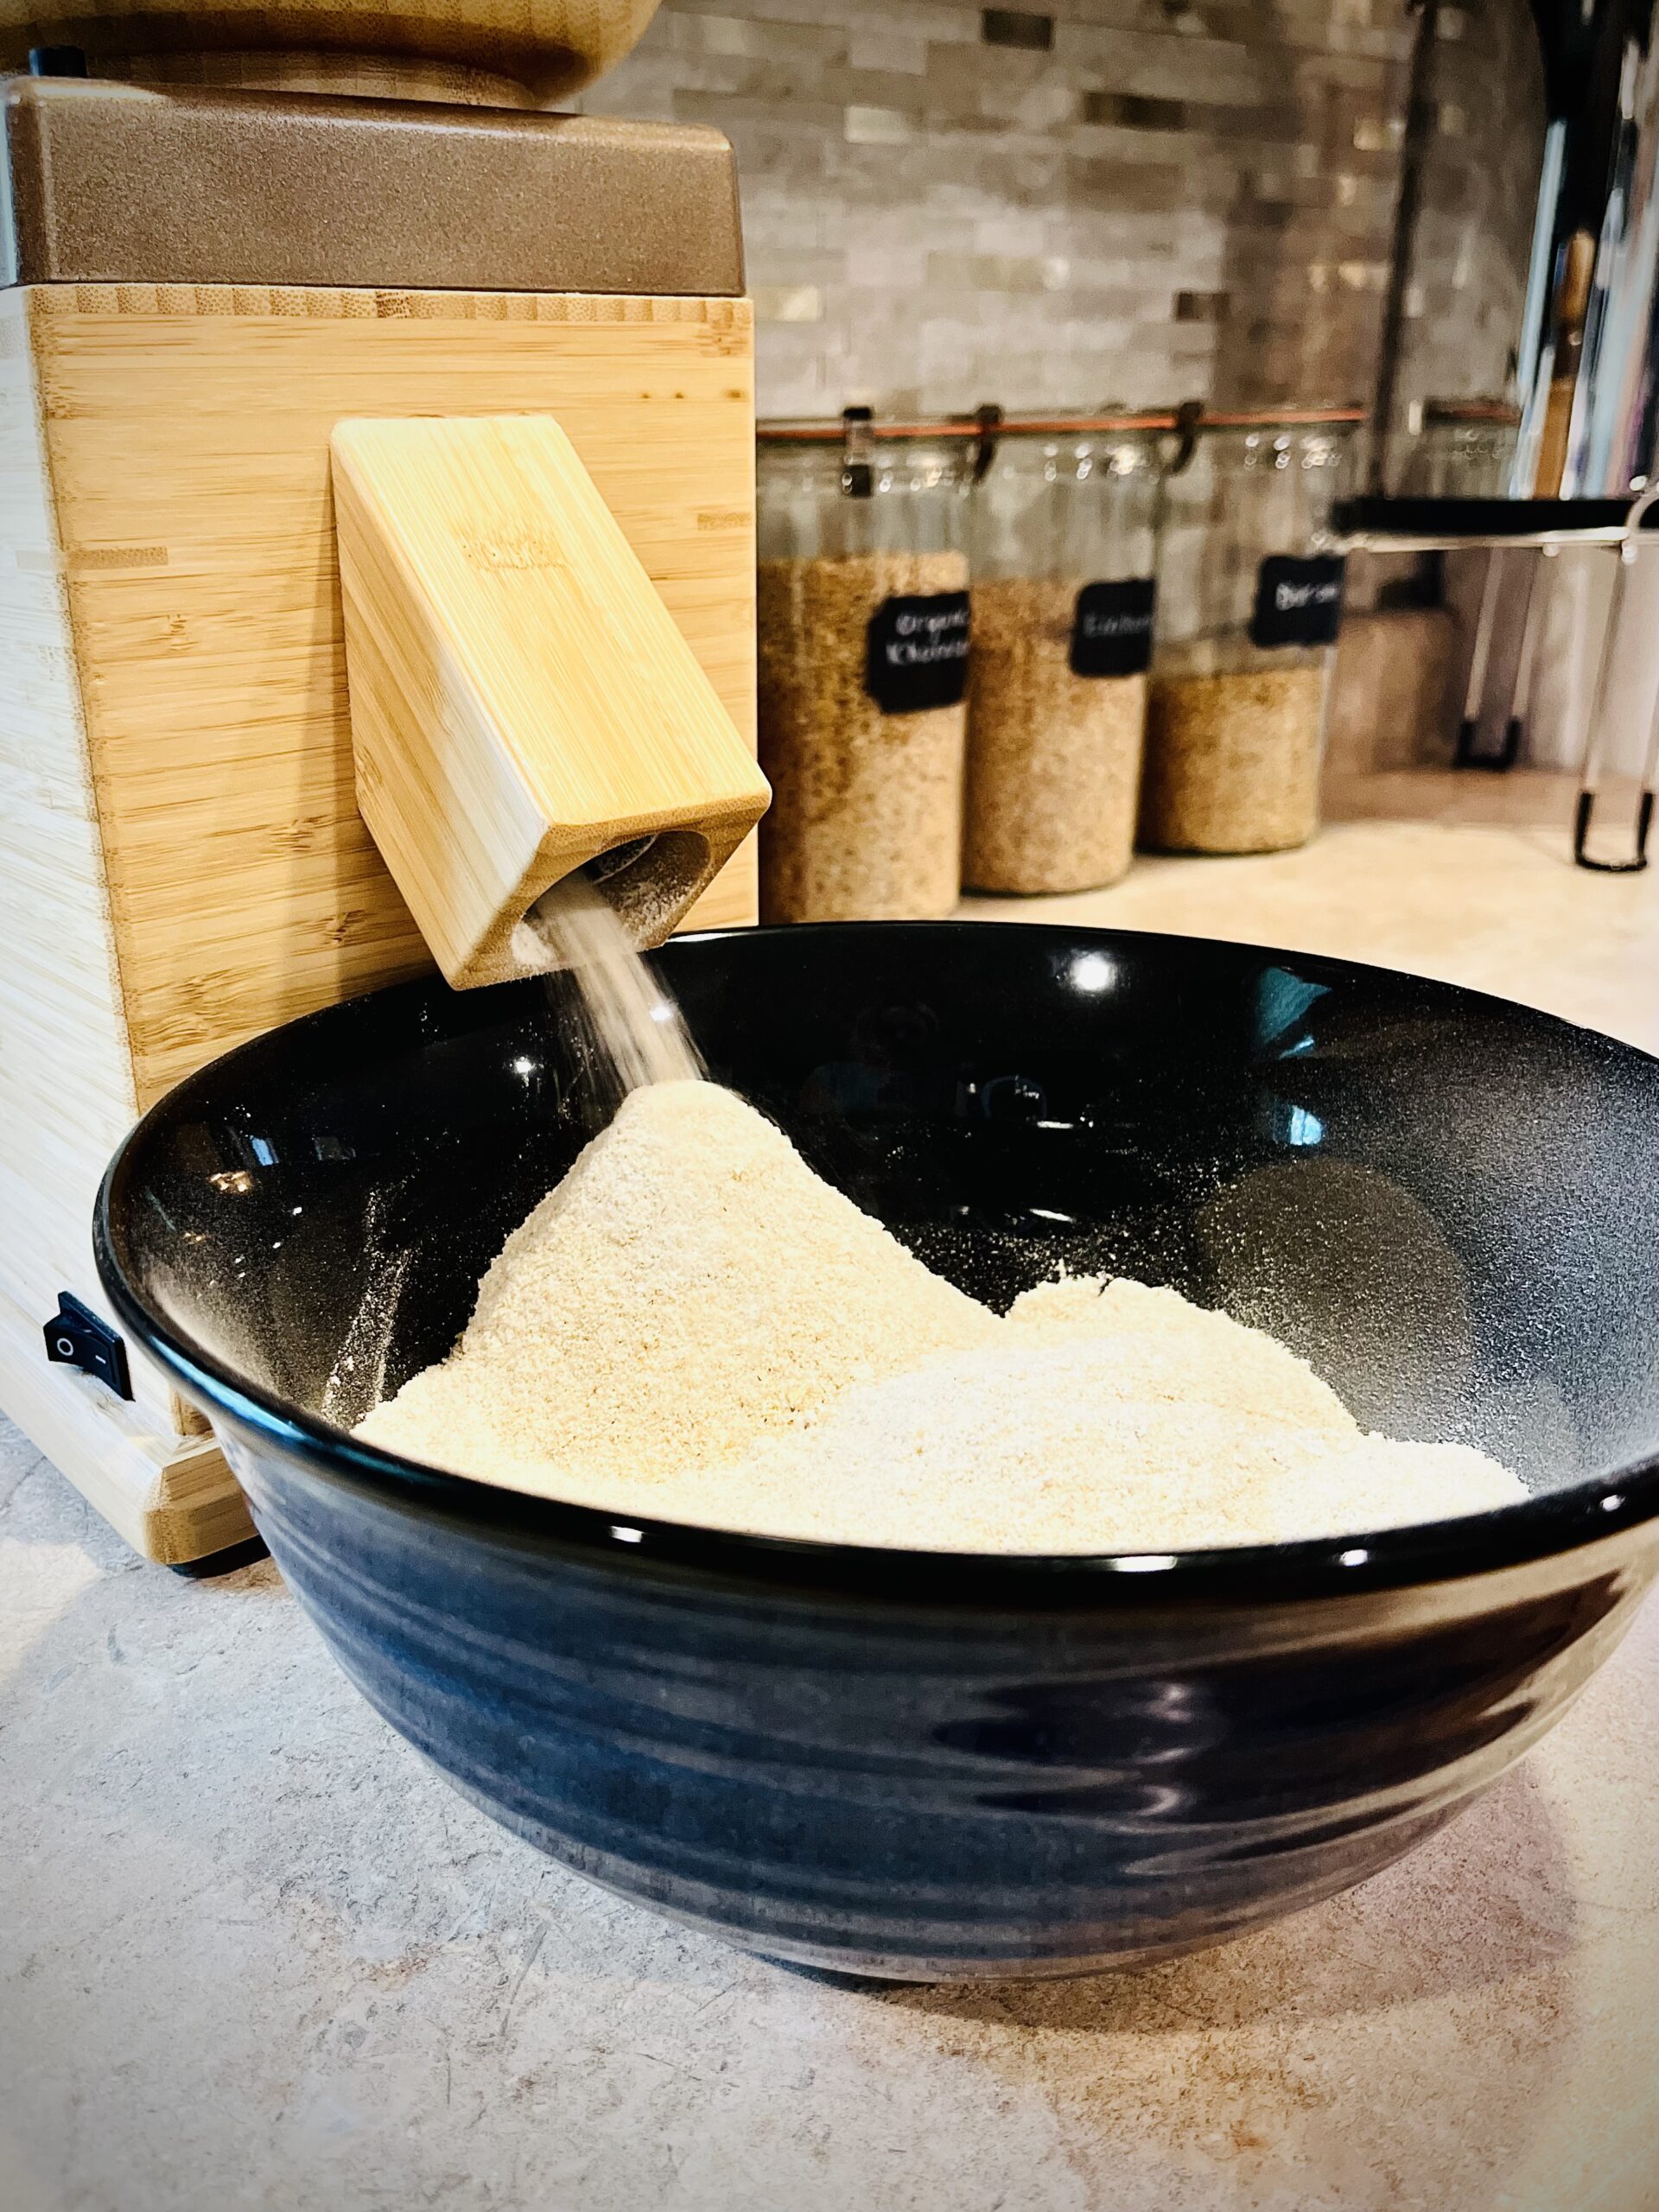
Weigh 500 g of hard white wheat berries. Run through your grain mill on a fine setting. I have my NutriMill Harvest set at the finest setting. If you have trouble getting all the flour to move through your mill you may need to weigh out one or two grams extra of wheat berries to account for any loss you may experience in the milling process.
If you are looking for other combinations of wheat berries instead of just hard white wheat alone, I also like to use a combination of hard white wheat and khorasan. We love the flavor khorasan adds. Just be sure to use a 1:3 ratio. To get soft tortillas, your fresh milled flour needs to have a the proper protein content to develop a strong gluten structure. While khorasan is high in protein content, it’s doesn’t have the require type and structure to develop a strong gluten bond. Hard red wheat berries would also work well for this recipe.
Mixing Fresh Milled Flour Tortillas:
Next, add 6.5 grams of dry milk powder (may omit if allergic to dairy) , 8.5 grams of baking powder, and 11.5 grams salt. Mix gently with a spoon.
After that, add 80 g of cold lard (may substitute cold unsalted butter) . Use a pastry knife to cut the lard into the dry ingredients. Continue cutting the lard until the texture looks like a coarse cornmeal.
Once you’ve achieved the right texture, make a well in the center and pour in ½ the warm water. Mix with a dough hook (or your hands). Once mixed add the remainder of the warm water and continue mixing just until there are no dry ingredients left in the bowl.
Autolysing (resting) Fresh Milled Flour Tortillas:
Once the ingredients are mixed, cover and allow the mixture to rest for 15 minutes. This process is called autolysing. It’s very important to make sure the bran and wheat germ of fresh mill flour have enough time to soak up all the liquid and soften up.
Kneading Fresh Milled Flour Tortillas:
After this rest period (autolysing), remove the dough from the bowl and place on your work surface. Knead the dough for about 8-10 minutes or until the dough no longer sticks to your hands.
Relaxing (resting) Fresh Milled Flour Tortillas:
Cover airtight and let the dough rest for at least 1 hour. Resting for 2 hours is even better if you have extra time. When you kneaded the dough, you were developing the gluten. For soft tortillas it’s important for you to allow all that gluten to relax before you move onto the next step. If you skip this step your tortillas will be hard, brittle, and crumble.
Shaping Fresh Milled Flour Tortillas:
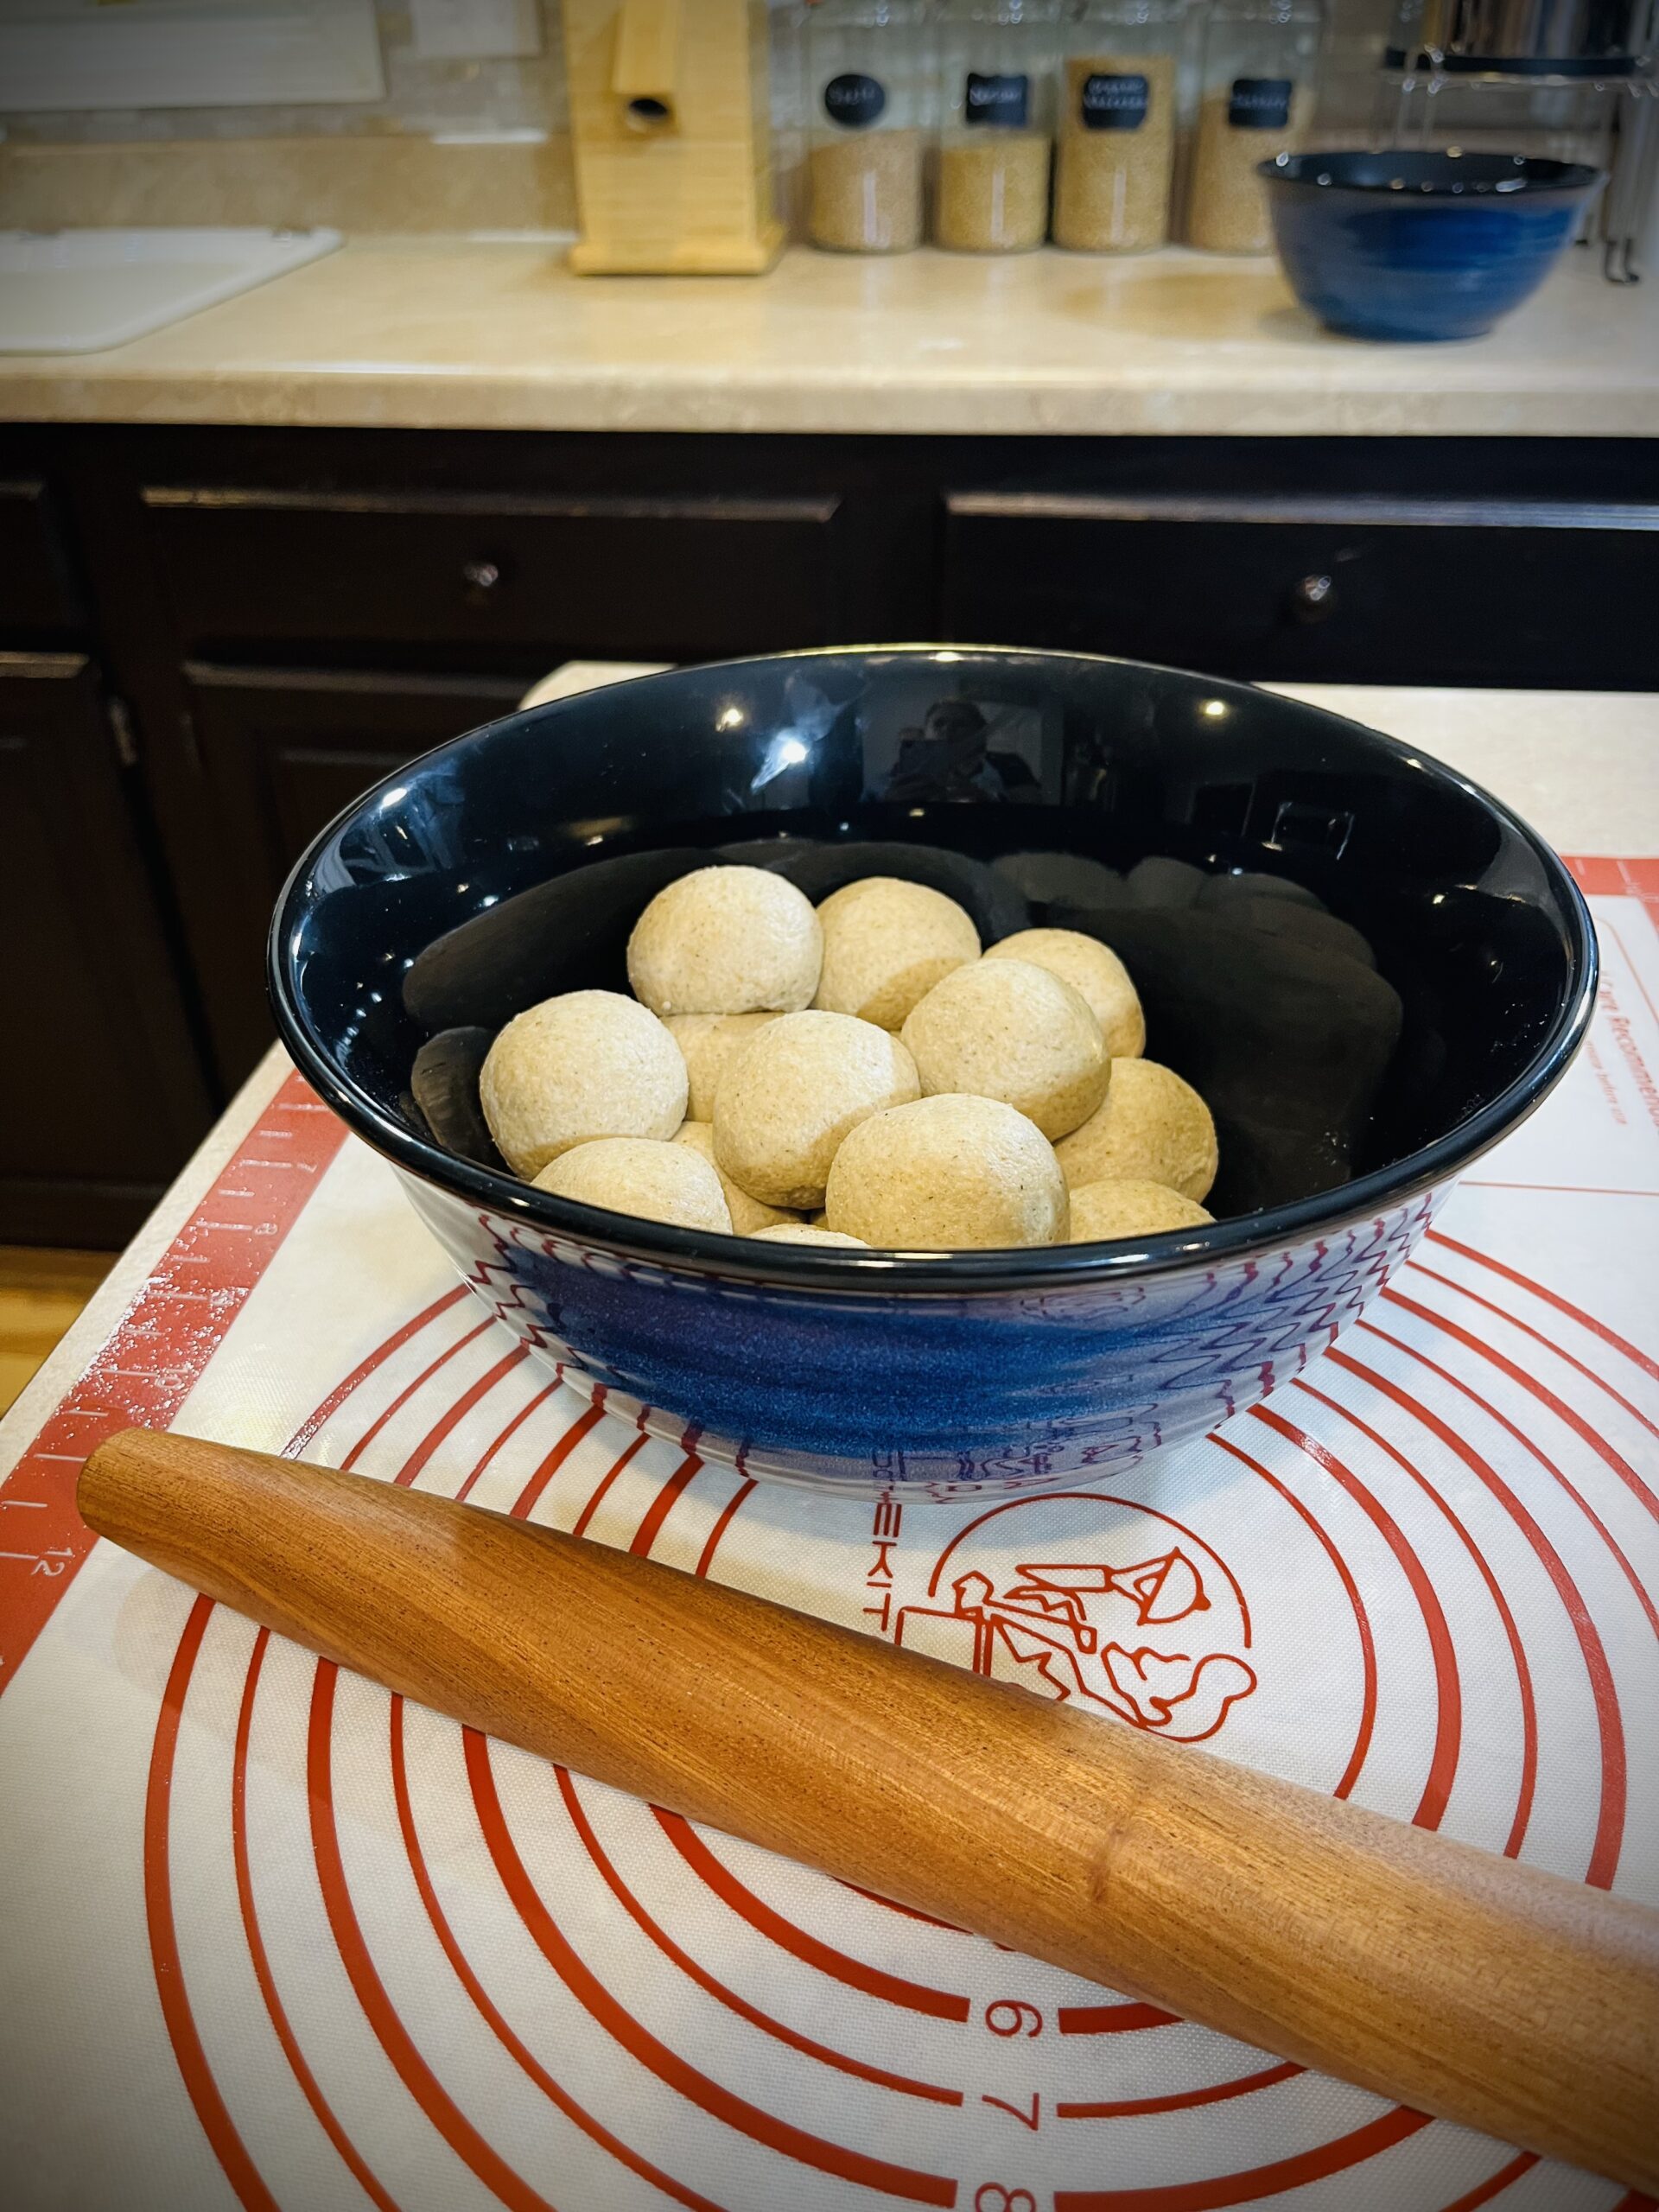
After the dough has relaxed, divide into 18 equal portions. There are several methods you can use.
Option 1:
Take the dough and squeeze a piece up through your thumb and fingers until it creates a tight ball and pinch off. Finish rolling in your hands until a sphere is formed then set aside. Continue until you have all 18 pieces of a similar size rolled into balls.
I, on the other hand, have trouble guessing what size the dough ball needs to be to get them all a similar size. So, I prefer option #2.
Option 2:
Pull out your scale and weigh the total amount of dough. You should have somewhere around 921.3 grams give or take. Then, take that amount and divide by 18. You’ll get somewhere around 51.18 grams. Use your dough scraper to cut a piece of dough off. Weigh the piece of dough and add or remove dough to it until you get as close to 51.2 grams (or whatever your final number was). Repeat until you have 18 individual pieces of dough of the same size. Once your dough is divided, you’ll need to create some surface tension. Hold the dough in one hand and use your fingers on the other hand to pull down on the sides. At the same time, use your finger on the first hand to push the dough up into the center from underneath. Repeat this process until you’ve gained a good amount of tension on the ball. Then, you can roll the ball in your hands to finish forming a sphere. Since I have small hands, I prefer to create surface tension by pulling the dough across my work surface instead of rolling it in my hands.
If you’re new to bread making it takes a little bit of practice but don’t give up. Test out a few different ways and then do what works best for you.
Relaxing (resting) Fresh Milled Flour Tortillas:
After you’ve created surface tension and formed all 18 balls of dough, cover and let it rest for at least 1 more hour. 2 hours or more is even better. You just worked the gluten when you were forming the individual balls. It’s important to let it relax back down. Fresh milled flour requires more time to develop and relax than store bought flour. Okay, so the dough is relaxing, now is a great time for you to relax too. See you back in 1-2 hours.
Rolling Fresh Milled Flour Tortillas:
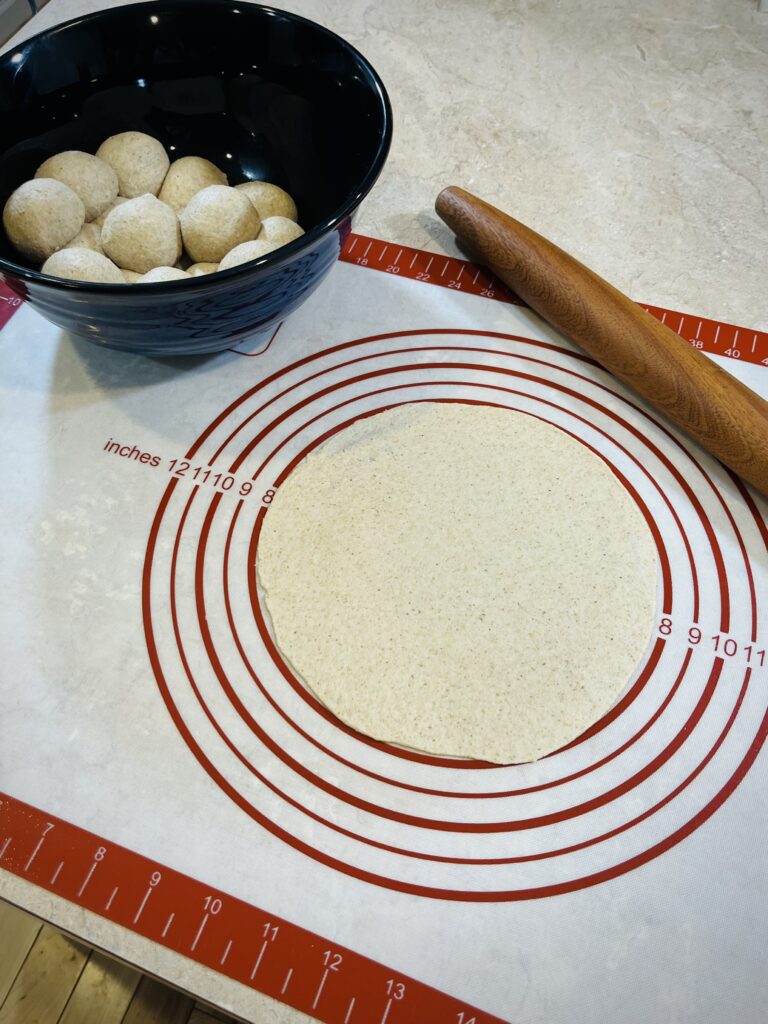
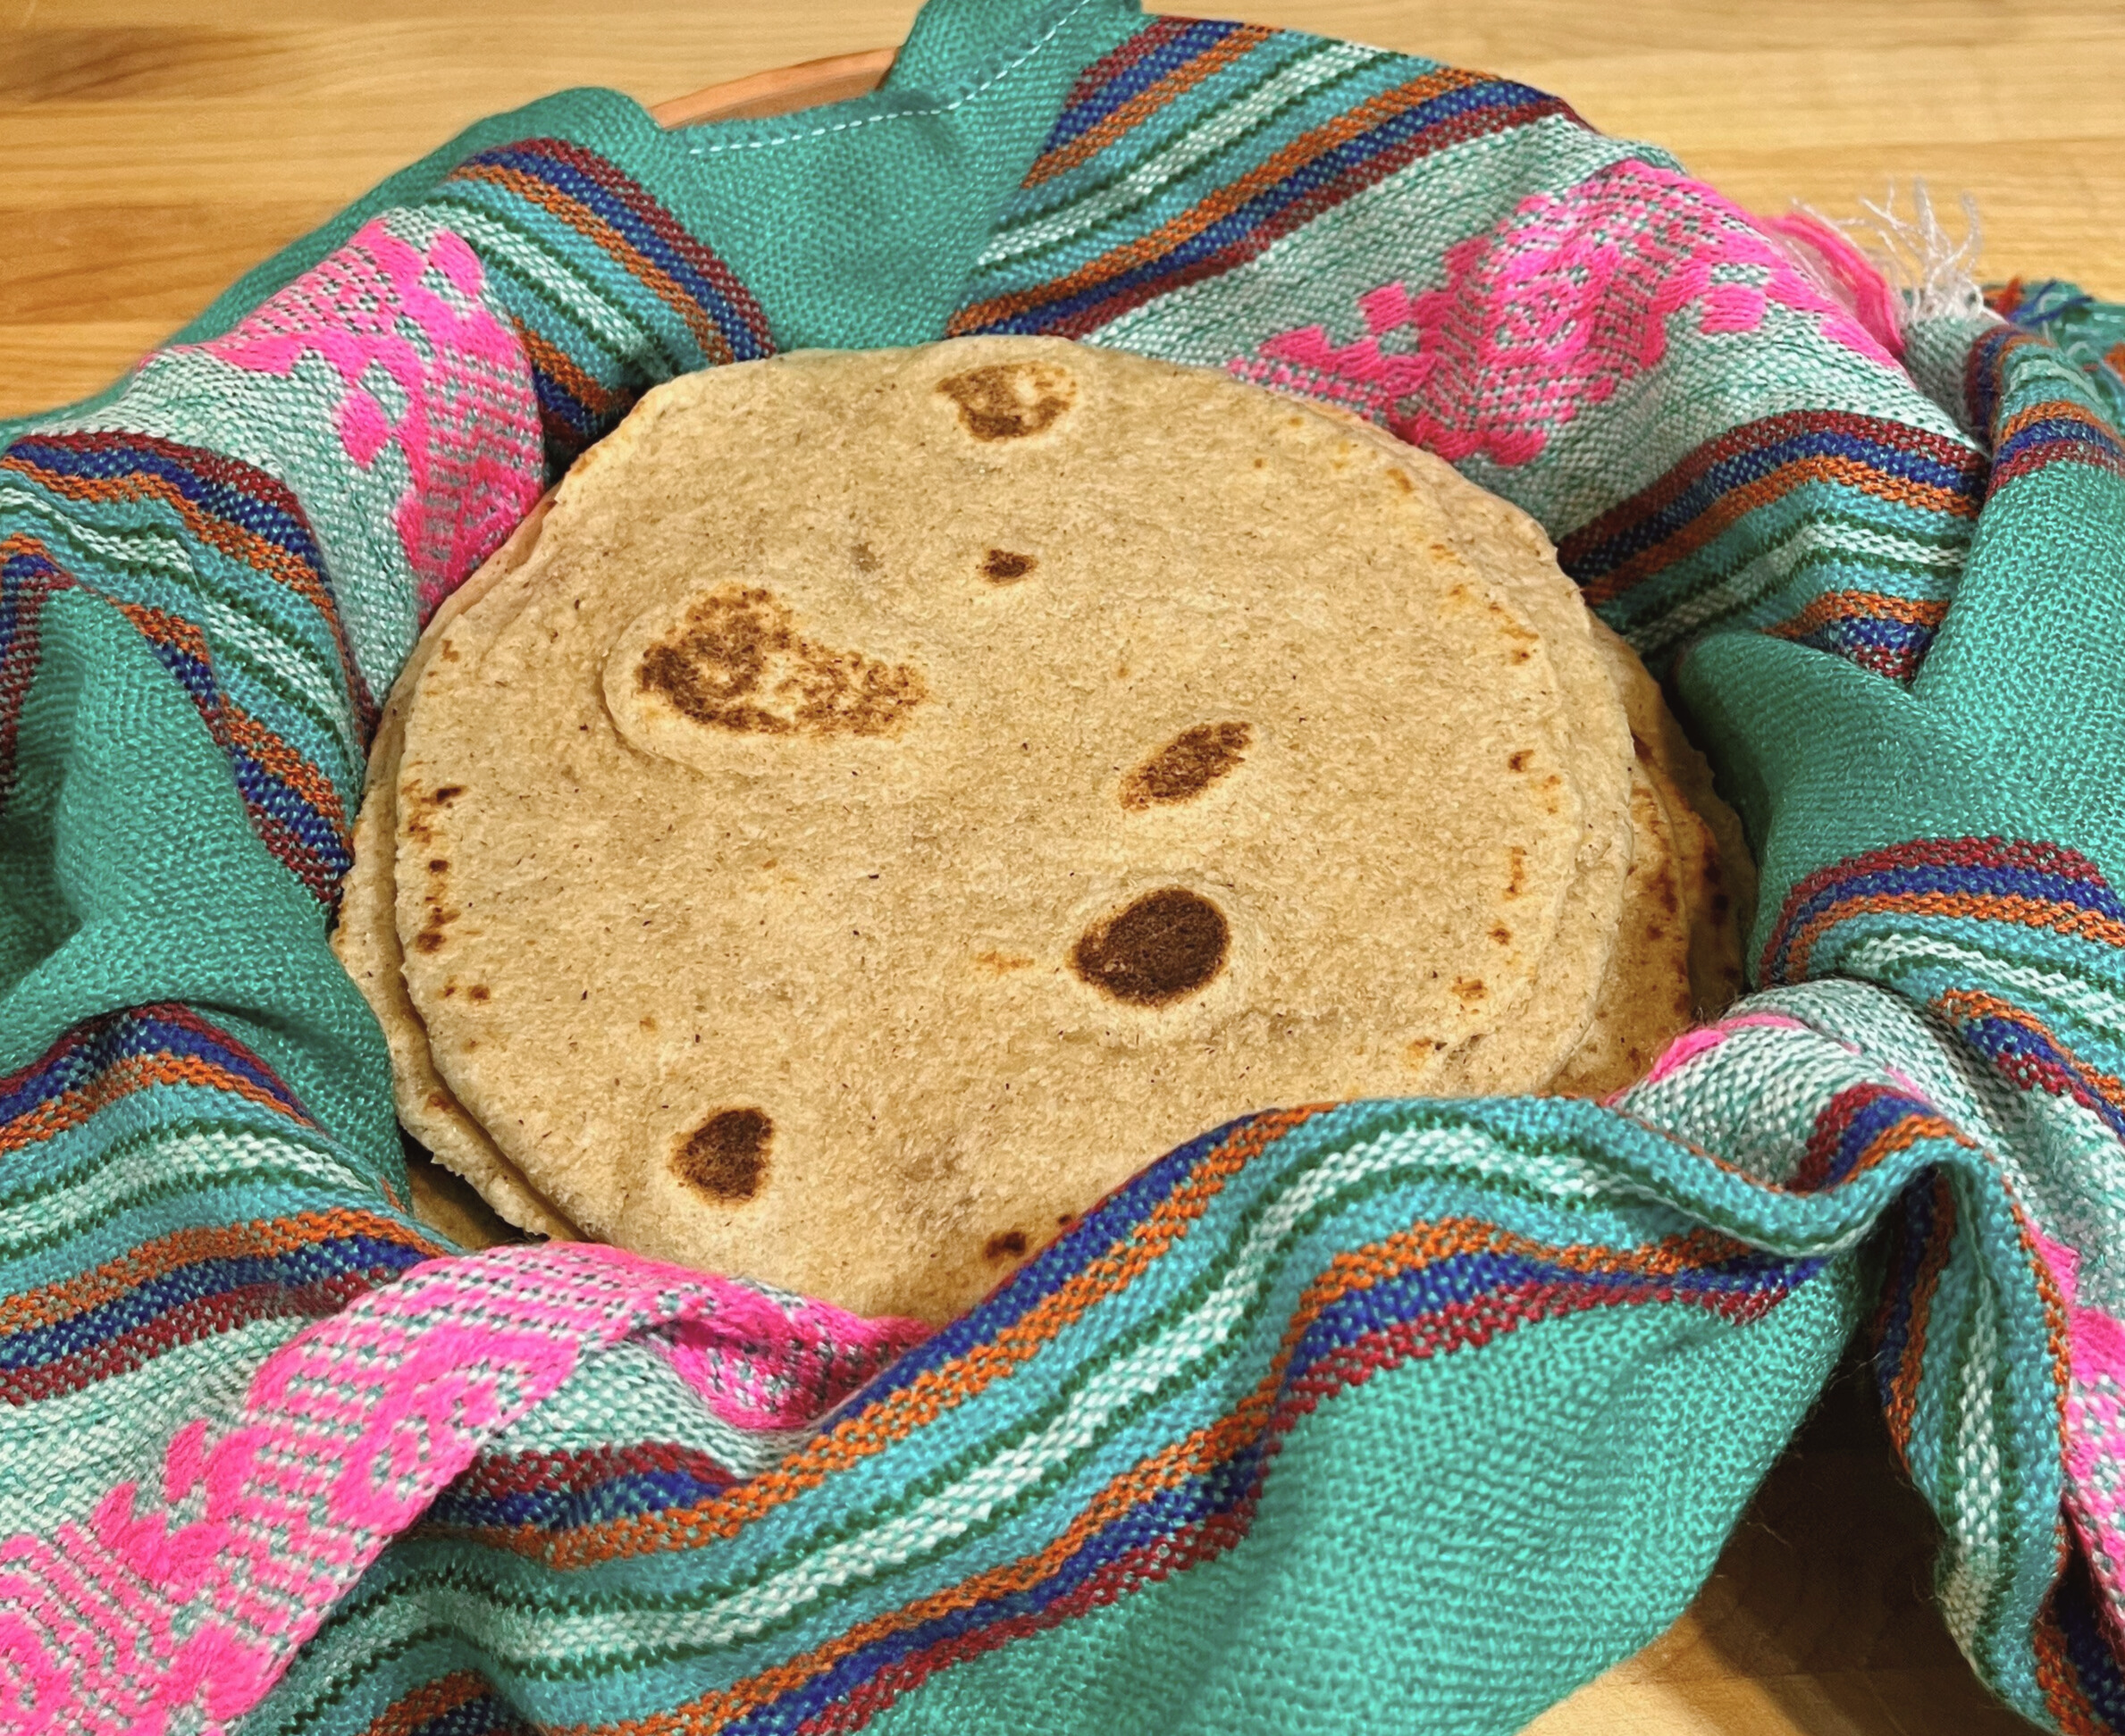
The dough has relaxed, it should be very soft and stretchy. If it’s not, cover it back up and let it relax 15-30 more minutes. Now, it’s time to start rolling them out. Grab a ball of dough and gently smash it down with your hands. Then, softly pinch the dough on the edges working your way all the way around. Next, place it on your work surface and roll gently up and down once. Pick it up and turn it 90° and roll up, then down again. Then, work your way around the dough gently rolling it into a circle. Once you have it rolled out to about an 8-inch circle, do a final roll across the dough to ensure it’s an even layer all the way across. Confused yet? If you are, it’s okay, check out my video and then just practice. On a high level, you’re just rolling the dough out into a circle shape the best you can. If it’s not a perfect circle it’s okay. What truly matters is that these tortillas will be delicious and soft, sure to be loved by your family and friends.
Cooking Fresh Milled Flour Tortillas:
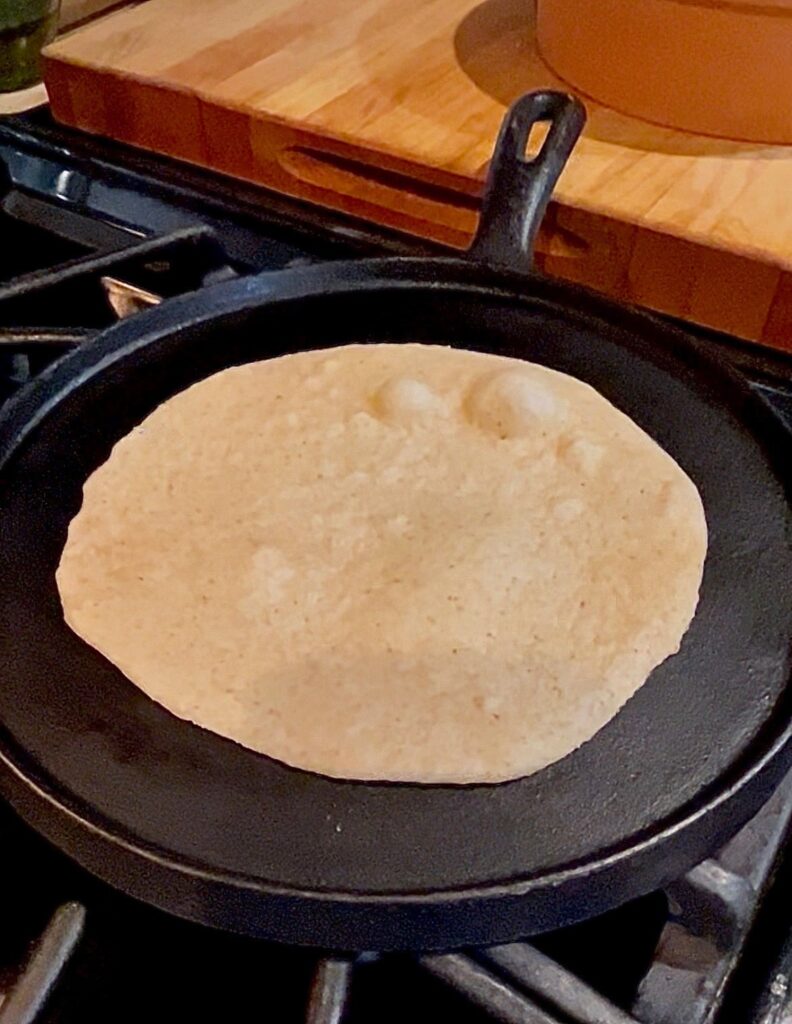
After you’ve rolled the dough into an 8-inch circle. Carefully, pick up the tortilla from the edge and place it on the tops of your hands. Very lightly stretch the tortilla once. Rotate and stretch again. I usually do this part as I’m moving toward my hot comal (griddle). Then, carefully place on a hot (between 475°F-525°F) griddle. Be careful here. This griddle is hot! You don’t want to burn yourself. As soon as you get the tortilla on the griddle give it a small back and forth movement.
Tip:
You want it to move across the surface. If it doesn’t, carefully (it’s hot) slide your fork under the tortilla until it releases from the griddle. If you don’t do this step right away, the part that is sticking will burn.
As your tortilla is cooking, you’ll start to see the dough bubble up. The sides will become puffier, and the color of the dough will ever-so-slightly lighten up. The first side should take approximately 1 minute to cook. Now it’s time to flip the tortilla. Most of the time I use a fork to flip them. You can use a spatula if that works best for you. Once flipped, cook the other side for about 1 more minute. Once again, you’ll see it bubble up and that’s an indicator it’s getting close to being done. If you flipped the first side too soon, it’s okay to flip the tortilla over and cook it a little bit longer until it looks like it’s cooked all the way.
Tip:
Keep a good eye on the temperature of your griddle. If it’s too hot it will burn. I often slightly adjust the burners during the cooking process to make sure my griddle remains at the right temperature.
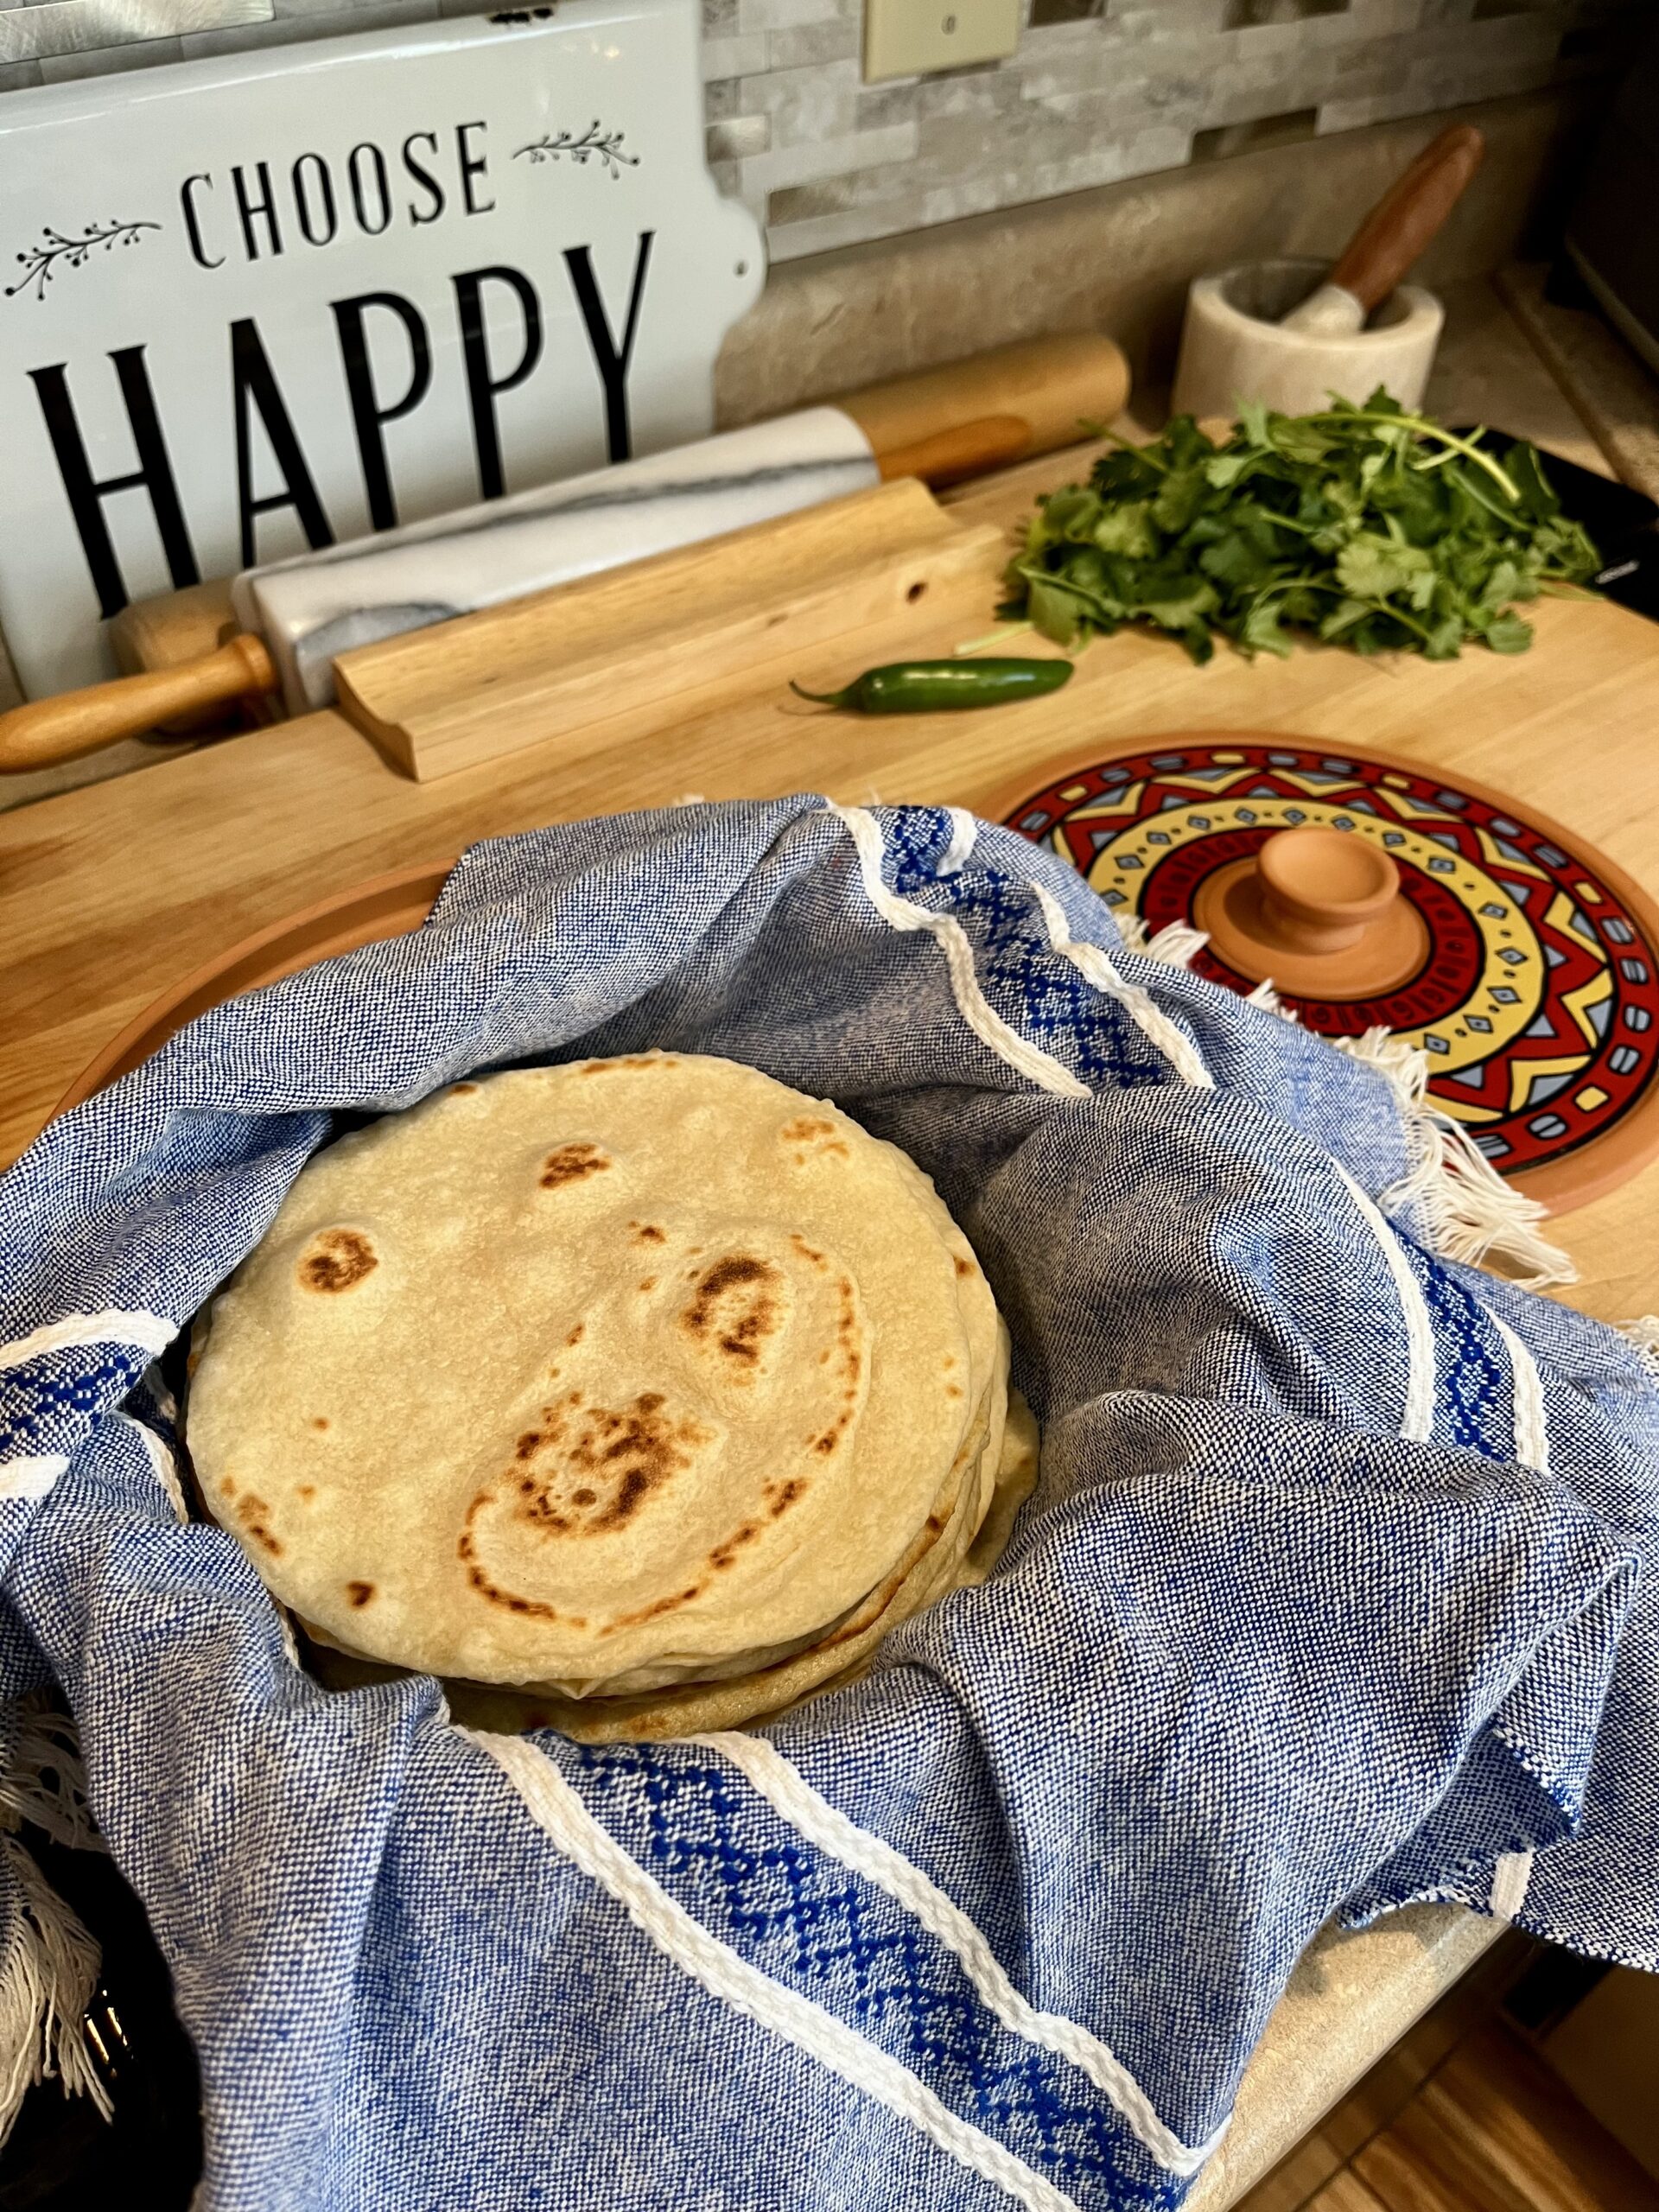
The last step is an important one. Place a clean towel in a tortilla warmer. Remove the tortilla from the griddle, wrap the tortilla up with the towel and place the lid on it. This process is more than just keeping them warm. It catches the steam from the tortilla and helps it soften up even more.
Continue rolling and cooking the tortillas and placing them in the container one by one. Immediately covering each time until all 18 tortillas are done. IF there are any leftovers, you can refrigerate or freeze them. They can be warmed up in the microwave with a damp towel over them or on a warm griddle. But let be honest, fresh tortillas are so good there are rarely any leftovers.
Shop this post:
*This post contains affiliate links. As an Amazon Associate, I earn from qualifying purchases. If you click and make a purchase, I may earn a small commission at no extra cost to you. Rest assure, I only recommend products I have personally used and genuinely love, so you’re in good hands.
Use code GRANDMA20 to get $20 off Bosch Mixers, Artiste, and Magimix
Brod & Taylor Precision Kitchen & Coffee Scale with Timer | (0.1g Precision)
Rumford Baking Powder, 8.1 Ounce (Pack of 2)
Now Designs Reusable Bowl Cover to Reduce Waste, Ticking Stripe – Large & Medium | Set of 2
Jillmo Danish Dough Whisk, 12inch Stainless Steel Bread Whisk
Soft and Flexible Tortillas Made with Fresh Milled Flour
Ingredients
Method
- Measure 500 g of hard white wheat berries. Run through your grain mill on a fine setting. If you have trouble getting all the flour to move through your mill you may need to weigh out one or two grams extra of wheat berries to account for any loss you may experience in the milling process.
- Add 6.5 grams of dry milk powder, 8.5 grams of baking powder, and 11.5 grams salt. Mix gently with a spoon.
- Add 80 g of cold lard. Use a pastry knife to cut the lard into the dry ingredients. Continue cutting the lard until the texture looks like a coarse cornmeal.
- Make a well in the center and pour in ½ the warm water. Mix with a dough hook (or your hands). Once mixed add the remainder of the warm water and continue mixing just until there are no dry ingredients left in the bowl.
- Cover and allow the mixture to rest for 15 minutes. This process is called autolysing. It’s very important to make sure the bran and wheat germ of fresh mill flour have enough time to soak up all the liquid and soften up.
- Remove the dough from the bowl and place on your work surface. Knead the dough for about 8-10 minutes or until the dough no longer sticks to your hands.
- Cover airtight and let the dough rest for at least 1 hour. Resting for 2 hours is even better if you have extra time.
- Divide into 18 equal portions. Roll into balls creating surface tension.
- Cover and let it rest for at least 1 more hour. 2 hours or more is even better. You just worked the gluten when you were forming the individual balls. It’s important to let it relax back down. Fresh milled flour requires more time to develop and relax than store bought flour.
- The dough should be very soft and stretchy. If it’s not, cover back up and let it relax 15-30 more minutes.
- Grab a ball of dough gently smash it down with your hands. Then, softly pinch the dough on the edges working your way all the way around. Next, place it on your work surface and roll gently up and down once. Pick it up and turn it 90℉ and roll up, then down again. Then, work your way around the dough gently rolling it into a circle. Once I have it rolled out to about an 8-inch circle, do a final roll across the dough to ensure it’s an even layer all the way across.
- Carefully, pick up the tortilla from the edge and place it on the tops of your hands. Very lightly stretch the tortilla once. Rotate and stretch again.
- Carefully place on a hot (between 475℉-525℉) griddle. Cook the first side approximately 1 minute.
- Flip the tortilla and cook second side for approximately 1 more minute. If you flipped the first side too soon, it’s okay to flip the tortilla over and cook it a little bit longer until it looks like it’s cooked all the way.
- Tip: Keep a good eye on the temperature of your griddle. If it’s too hot it will burn. As needed slightly adjust the burners during the cooking process to make sure my griddle remains at the correct temperature.
- Place a clean towel in a tortilla warmer. Remove the tortilla from the griddle, wrap the tortilla up with the towel and place the lid on it. This process is more than just keeping them warm. It catches the steam from the tortilla and helps it soften up even more.
- Continue rolling and cooking the tortillas and placing them in the container one by one. Immediately covering each time until all 18 tortillas are done.

JOIN MY NEWSLETTER TO RECEIVE…
The latest blog post, recipes, and updates!